Anti-Virus Software - PC-cillin
If you share files, use the internet, send or receive e-mail virus protection is a must. Viruses and other computer intrusions can cause you unwanted down time and stop your ability to be productive or simply enjoy your computer. Since 1999 I have used the virus protection software called PC-cillin. It was recommend to me by my computer guy. Their web address is actually www.AntiVirus.com. That alone should tell you they were ahead of the game a long time ago. I'm not saying that there is no other suitable software to protect you from these attacks, I'm just saying I only recommend one - PC-cillin. There are a few reasons:
A. I can count on one hand how many times I have gotten a virus since
using the product. Good protection.
B. There software updates daily.
C. They have settings that are easy to manage.
WARNING: Before installing any new anti-virus software, you should un-install any and all anti-virus software that you already have installed on your computer. If you have more than one virus software installed on your computer it will likely cause software conflicts and cause one or both not to work properly.
Below I have listed the setting that I use with their Internet Security 2006 software. This is their personal computer software. They have other software for different computer/server uses but for most people that use PC's, Internet Security 2006 is the likely choice.
After installing the software you should:
- Open the main console. This can be done by double clicking on
the pill icon that has appeared near your clock.

- Click the "Register Now" button that is located near the lower right side of the screen. It is necessary for the software to update. It should launch an internet browser.
- Once the browser is opened, choose the top registration option. The others simply do not seem to work well.
- Enter your information, uncheck any of the options on the bottom of the screen and click the button at the bottom.
- On the next screen you will confirm your information and click the button on the bottom of the screen.
- The next screen will inform you that the software has been registered. I usually close that box and go back to the main console. (If you want to join their service I guess that's ok. I have done it in the past and did not see any benefits).
- Once back to the main console, click the "Update Now" button.
The software should update and may ask you to restart your computer.

- After your software is updated, you should scan your entire
computer for viruses to make sure it's clean. Click the "Scan Now"
button and perform a scan of your entire computer.

- On the next screen click the "Scan Now" button.

- The scan window will pop-up and begin scanning your computer. I
usually check the box at the bottom of the screen that says "Close
window if no incidents are detacted".

- After the scan, return to the main control panel and click the
"Antivirus" button.
- On the next screen click the "Manual and Scheduled Virus Scan"
option.

- Then click the "Scheduled Scan" tab.

- Select a task.

- Then click the "Edit" button.

- Change the hour to a time that wont annoy you.

- Click "Ok".

- Repeat steps 14 through 17 for each task.
- Then click the "Back" button.

- Click the "Mail Scan" button.

- Un-check the "Show popup message when scanning" box.

- Click "Apply".

- Click the "Email Client (Outgoing)" tab.

- Un-check the "Show popup message when scanning" box.
- Click "Apply".
- If you check your e-mail using an internet browser (like aol,
msn, hotmail, or check your own mail) instead of using a software
like Outlook or Outlook Express, click the "Webmail" tab.

- Check the "Scan Webmail messages" box.

- Un-check the "Show popup message when scanning" box.
- Click "Apply".
- Then click the "Back" button.
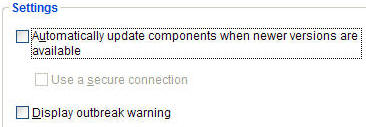
- Click the "Outbreak Warning" option.

- I usually uncheck all boxes on this screen. Really, who cares?
As long as I'm protected. If I'm not protected I'm sure they wont
warn me.
- Click "Apply".
- Then click the "Back" button.
- Click the "Anitspyware" button.
- Change the hour to a time that wont annoy you.
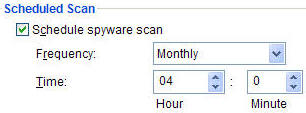
- Click "Apply".
- Then click the "Back" button.
- Click the next section, "Antiphoshing & Content Protection".
(Some of the features in this section are new to the software for
2006. I haven't tried some of them so you can test them for
yourself).

After reviewing this section I think you may benifit from running the "Antifraud Wizard". You can go to the next step or skip to item 41. - You can run the "Anitfraud Wizard" here. That should take care
of what you need.
 then
then

Note: If you run the Antifraud Wizard, you can skip to number 45. - I have used the Spam filter so click the "Spam and Fraud
Filters" link. This section will drastically reduce the amount of
Junk Mail you get. It's a pretty clean filter, not like some of the
other filters that major isp providers use (like Yahoo, AOL,
Hotmail, etc.). Very few of my "wanted" messages are tagged Spam
(maybe 1 out of every 10,000).

- Check the "Check for spam and fraudulent messages" box.

Here you can also manage your "Exception List" as well. If you want to add a specific e-mail address, etc. - Click "Apply".
- Then click the "Back" button.
- Click the "Network Security" button. Here you will set your
software to the type of Network you use, if any. If you do not have
or use a network skip to number 58.
- If you use the main computer on the network or are the network administrator
of your network and want to control the software on the other
computer that are connected to your system, click the "Private
Network Protection" button and activate those features. If that's
not the case, go to number 47.

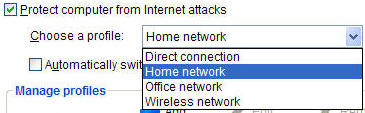
- Click the "Personal Firewall" option.

Here you can edit each type of network setting you have/use. If you have a laptop that you take from one location to another (connect at the office then at home), you should change these setting to function properly. I have a laptop that I use at home and work. I also have networks at both locations. At home, I have a router with more than one computer on the internet at the same time (connected through the router) so I'm going to set my software to meet those needs. When set correctly, the software will provide the best protection from hackers, spoofing, etc. - Choose your primary usage type.
- Click the "Apply" button.
- Click your primary profile in the "Manage Profiles" box.
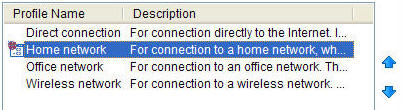
- Click the up arrow to move your primary profile to the top of
the list.

- Click "Apply".
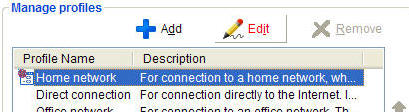
- Click your primary profile type to highlight it (blue) then
click the "Edit" button.
- When the edit box pops up, go through each tab making the
necessary changes. I believe you can only edit the profiles that you
are connected to at the time. So if you are at the office, you can
edit the Office network profile. If you are home, you can edit the
Home network profile. I do not see how it could be possible to edit
the profile if you are not connected to it.
On the "Network" tab, select the type of internet connection that you use. If you choose "Wired or wireless local area network" use the drop down list to choose your network device, then click the "Get" button to have the software load your setting automatically.
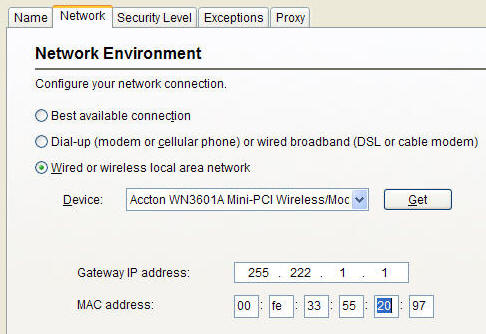 (For all you hackers out
there, these are not my actual settings :-p).
(For all you hackers out
there, these are not my actual settings :-p).
On the "Security Level" tab, I use the "Medium" setting. Use your mouse and slid the arrow up to Medium.
 &
&

After you make your changes/adjustments, click the "Ok" button.

- NOTE: If you made Personal Firewall
changes, and you use a laptop computer that you take to multiple
locations, you also need to check the "Automatically switch to the
appropriate profile" box. If you fail to check this box your
firewall will not work properly.

- Click "Apply".
- Then click the "Back" button.
- If you use a wireless network device and want to protect your
system from wireless intrusions you can click that option and make
setting changes there. If you use a laptop and connect to networks
in public locations, I HIGHLY suggest you use this feature. It will
stop other's from connecting to your computer, etc.

- Last but not least click the "General" option.
- Click the "Update" option.

- Click the "Automatic Update" tab.
- Change the "Hours between updates:" to your desired setting, and
check the "Notify me..." box.
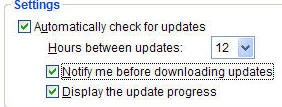
- Click "Apply".
- Then click the "Back" button.
- Click the "Preferences" option.

- Click the "Configure" button.

- Check and edit any changes on the Popup Manager.
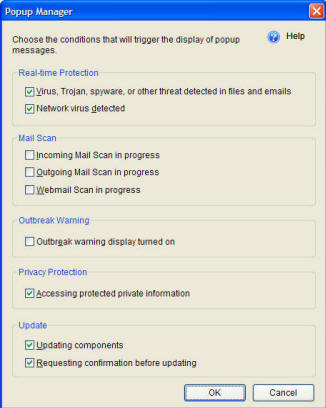
- After you make any final changes there, click the "Ok" button.
That's it. Wow, I didn't realize there were so many set-up changes to make with this software. If you missed something I don't think it would be the end of the world. The most important thing is that you have good virus protection. Click the "X" to close the Main Console.
After you complete the software set up you can set a message rule in your e-mail software to control the Spam messages that the software flags.
Please leave a donation, see the bottom of this page.
End of instructions.