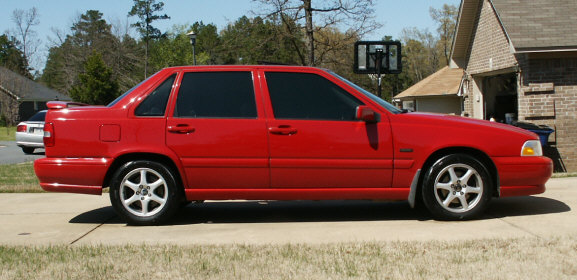
Fuel filter replacement instructions on a 1998 Volvo S70 GLT
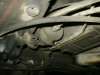
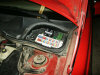
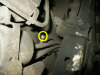
I ordered a tune up kit from iPd and it came with a fuel filter. Volvo recommends that you replace the fuel filter on these cars every 100,000 miles. This filter replacement was the easiest that I have ever done. Volvo figured out how to make connections that simply slide on and off. I was very surprised to find the ease in connecting the filter. It took me about 40 minutes to get the filter replace because I had to figure out how to get the filter out of the bracket. The fuel filter is just in front of the rear passenger side wheel.
Tools Needed:
| T-25 Screw driver | 13mm Socket |
| 12mm Socket | Fuel filter |
| Ramps or jack & jack stand | Gloves |
| Goggles | Rag |
| Shallow pan to catch the fuel | Caps and plugs to put in the line temporarily |
Instructions: Read each step in it's entirety before doing the procedure. It will help you avoid breaking parts, harming yourself, etc.
NOTE: About a cup of fuel come out of the line and filter so you may want to put a pan under the car to catch the fuel.
- Park the car on the ramps or where ever you plan to do the job.
The back or passenger side of the car raised.
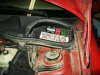
- Open the hood and remove the fuse box cover, 4 T-25 screws. It is easier to get to the screws if you open the hood all the way up.
- Remove the fuel relay.
- Try to start the car to relieve the fuel pressure.
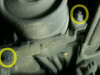
- There is a valve stem just behind the fuel filter. Remove the
cap from it and try to bleed off any pressure that may be left on
the line.
- Pull the line loose from the front of the filter. It just pulled
off for me.
NOTE: I used the caps from the new filter to plug the old filter to limit fuel spillage. I also used a plug in the line to limit the spillage. You can simply let it drain in a pan. - Pull the line loose from the back of the filter. It just pulled loose.
- Take the bracket loose with 13mm nut and a 12mm bolt.
- Work the old filter out towards the front of the car.
- Install the new filter in the bracket.
- Push the fuel lines on the filter.
- Secure the filter in the bracket.
- Install the line valve stem cap, make sure the seal is installed properly.
- Install the fuel relay.
- Start the car and check for fuel leaks.
- Turn the car off and install the fuse box cover.
- Close up the car.
- Properly dispose of the old filter. I suggest you take it to a gas station that services cars for disposal.


Please leave a tip, see the bottom of this page.
End of instructions.