|
Graphic Workshop Professional Instructions - TechnologyInstructions.com
Graphic Workshop Professional is a great software to manage and edit images /
pictures.
You can download and / or purchase it here:
http://www.mindworkshop.com/alchemy/alchemy.html
- Open Graphic Workshop. It will open to the last folder you were viewing
photo's in.
- In the folder list on the left, find the folder you want to view your
photos in.
- Once you have the folder selected, you will see gray icons on the main
window.
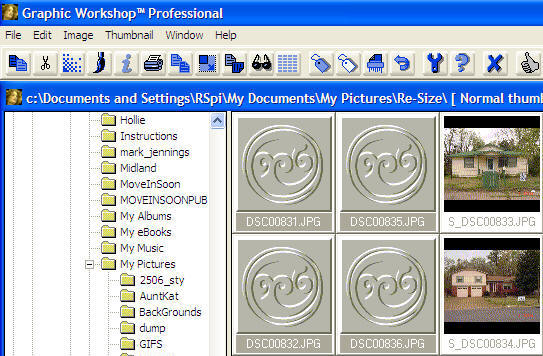
- To view thumbnails like the ones you see on the right you can either
change one or a few at a time or you can have the software make all of the
gray icons view your pictures.
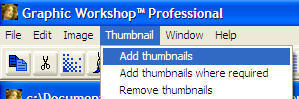
a. To add thumbnails to certain files, click one or more of the gray
thumbnails so that the file name is gray, click the
Thumbnail menu option at the top, then
click the Add thumbnails option.
b. You can set the software to add thumbnails to all your files
automatically by doing the following: Using your right mouse button,
right click on one of the gray files,
then left click on the Virtual thumbnails
menu option. Once you do this, the software is set to always make thumbnails
of every picture the software views in the main window.

You can stop this by right clicking
on a thumbnail and un-checking (left click)
the Virtual thumbnails menu option.
- To edit, resize, crop, get information, etc, highlight a photo
thumbnail (click it once so that the file name is gray), then
choose the function from the icons above
(when you move your pointer over the icons they will tell you what they do).

Another way to perform a function is to right click
on a thumbnail and choose the function
from the pop-up menu.
- Please leave a tip, see the bottom of this page.
End of instructions.
|