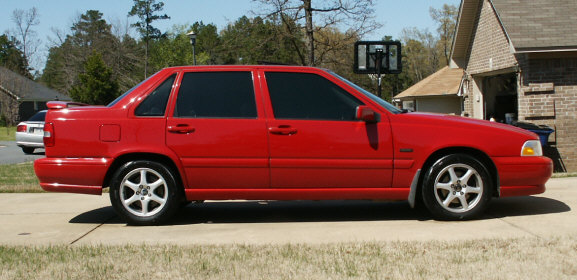
Brake pads, rear, replacement instructions on a 1998 S70 Volvo, also 850
Whenever you take a wheel off it's a good ideal to glance and see how
much brake pad you have left. You can use a small ruler to check the
material left on the pad. The new set of pads that I purchased had about
5/8 inch of pad material. My car had a little less than 1/8 inch of pad
material on it so I decided to replace them since it was that low. I
would suggest replacing them between 1/16 and 1/8 inch of thickness of
material left on the pad. You may also consider replacing the rotor if
you have a noticeable inset / grove on them. You can actually measure
the pad material with a small ruler.

Rear brake pad replacement is pretty easy. It can be done in 1 hour (30 minutes each).
You may also want to take this opportunity to bleed the brake caliper or replace the fluid in the system all together.
Even though these instructions are for a 1998 S70 GLT, I have found these same style pads on many Volvo's.
Tools Needed:
| Jack | Lug nut wrench |
| Jack stand | Hammer |
| Punch or small cross tip screw driver | Pliers |
| Pry bar or large flat tip screw driver | Brake pads (I got the PBR Deluxe) |
| Multi-purpose grease | Anti-seize compound |
| Wire brush | Face mask for dust |
| C-clamp, 4 inch |
Instructions: Read each step in it's entirety before doing the procedure. It will help you avoid breaking parts, harming yourself, etc.
NOTE: I'm not sure if it is an issue anymore but some brake pads use to have asbestos in them. Regardless if that is the case anymore, you really do not want to breath in the dust when you are taking the pads out.
- Park the car on a smooth flat surface.
- Set the parking brake.
- Jack the car.
- Install a jack stand to support the car.
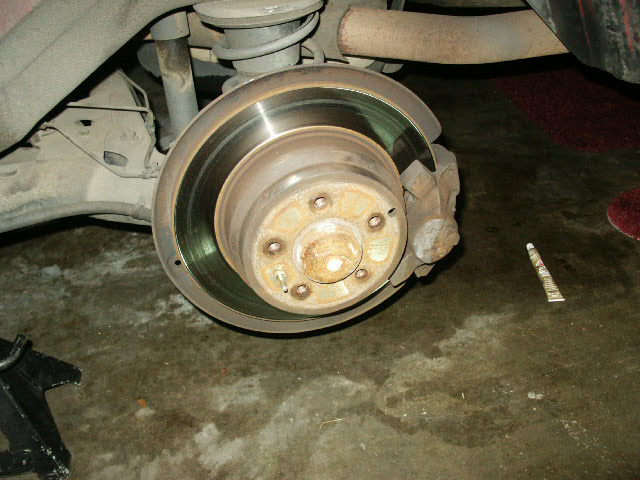
- Remove the tire.
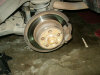
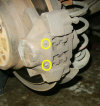
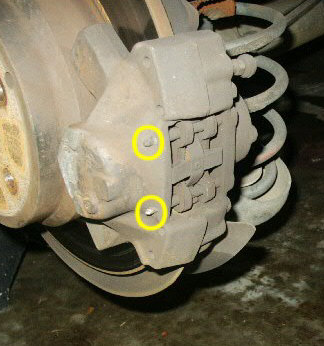
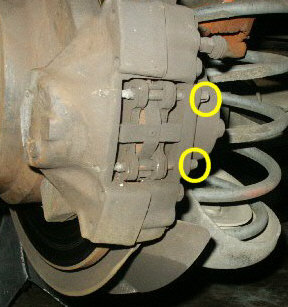
- Once the tire is off you can see the brake caliper and the two
pins and pressure / retaining clip that hold the pads in. Tap the
pins out as far as you can. You can use the punch or small cross tip
screw driver. Tap them towards the center of the car.
- Use the pliers and pull the pins the rest of the way out.
- Using the pry bar or large flat tip screw driver, slide it
between the pad and rotor and pry the outer pad out away from the
rotor to collapse the outer
side of the caliper piston and pull out the pad.
NOTE: You may be able to use the c-clamp. - Once you get the pad out you will see a the squeal shim on the pad. Take the shim off and clean it with the wire brush.
- Look into the slot that the pad was removed and make sure the caliper looks like it is in good shape. If the dust boot is loose from the caliper piston, try to figure out how to get that back on.
- Collapse the caliper piston with the pry bar until it is flush with the caliper.
- Grease the shim and the metal side of the brake pad. That helps reduce the chances of the brake pads squealing.
- Slide the new brake pad into the slot.
- Use the pry bar to collapse the caliper piston on the inner side. Make sure the piston is flush with the caliper.
- Remove the inner pad and inspect the caliper piston. Try to get the piston level with the caliper so it will be easy to get the new pad in.
- Clean off the squeal shim, apply grease on it and the metal part of the pad.
- Slide the pad into the caliper.
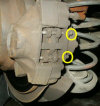
- Put the retainer clip into place and slide in the lower pad pin.
NOTE: Some people also grease the pins to reduce the chance of brake pad squeal. - Press the clip in place and install the top pin.
- Tap pins all the way in.
- Install the wheel and install the lug nuts.
NOTE: It is good to use anti-seize compound on the threads of the lug nuts and the part of the nut that mates with the wheel. I have actually see these bolts stuck on a wheel because they did NOT use the compound.
Please leave a tip, see the bottom of this page.
End of instructions.