Fuel Filter Replacement on a 1996 Saturn SL2

I picked up this 1996 Saturn a few days ago and was servicing it to pass it on to someone else and it had a massive fuel leak. It was pouring out just behind the drivers side front tire. I pulled the tire and found the fuel line going into the fuel filter loose. I clipped it on and went on my way. Filled up the tank later that day and the next day, on my way to a hospital appointment I noticed the gas needle dripping like a rock. It was already down to a half tank. I was able to pull off the freeway about 2 miles later, to find the line leaking again. Tried to connect it again and it come lose again about 2 miles later. Got to the hospital with 1/4 tank of gas (about a 18 mile drive). Long story short, could not get it to stay together so I picked up another filter assembly (after loosing about 11 gallons of gas @ 3.45 per gallon).
Anyway, I picked up the filter assembly at NAPA for about $31. It has a date stamp of Oct 2006, so it may have been sitting on their shelf for almost 5 years. Do people that drive Saturns NOT change their fuel filters? Besides that, the job took me less than an hour. The hardest part of the job is removing and installing the filter bracket nuts.
Tools Needed:
| Tire removal tools | Jack stand |
| 8 mm 1/4" socket | 1/4" Ratchet |
| Drip pan | Rags |
Instructions:
-
Open the hood.
-
Set the parking brake.
-
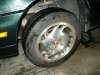
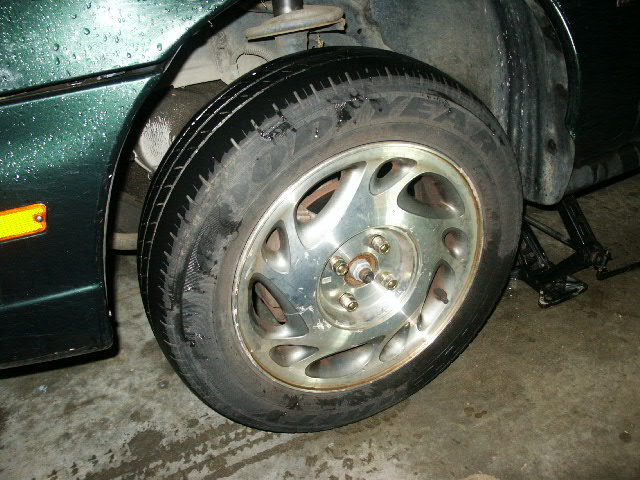
Jack the car a little at the drivers side front.

-
Remove the hub cap.
-
Brake the lug nuts lose.
-
Jack the car the rest of the way.
-
Install a jack stand.
-
Put drip pan in place.

-
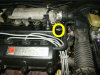
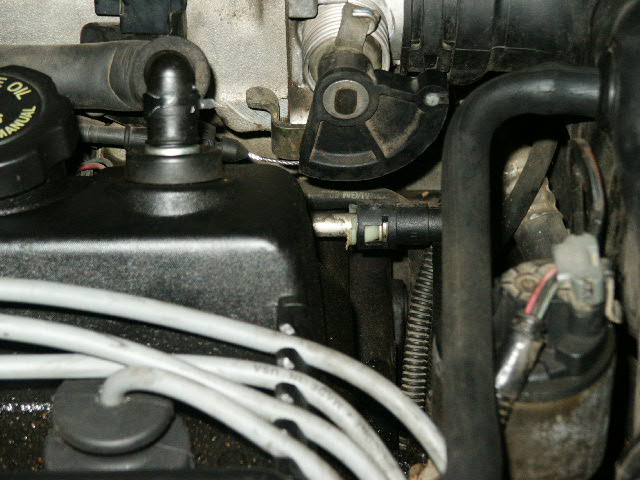
Remove the cap from the port that allows you to check the fuel pressure and relieve the fuel pressure from the system. You may want to use a rag to stop the fuel from spraying everywhere.
-
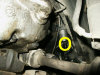
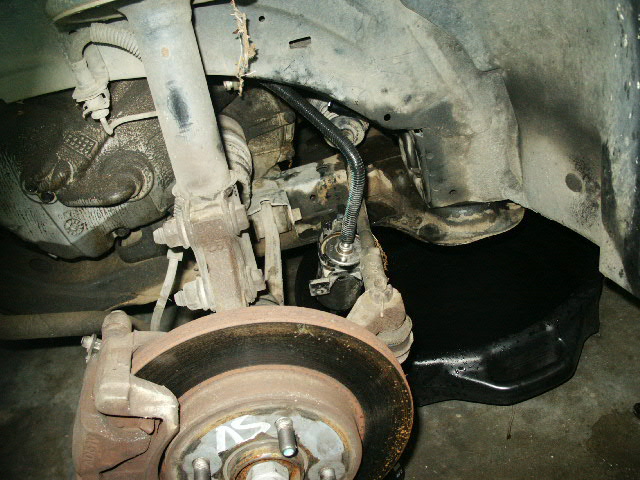
Unplug the gas line going into the bottom of the filter, it is located through the wheel area just inside the engine bay. It has a quick release, you will have to squeeze the top of the clips to release the connection.
-
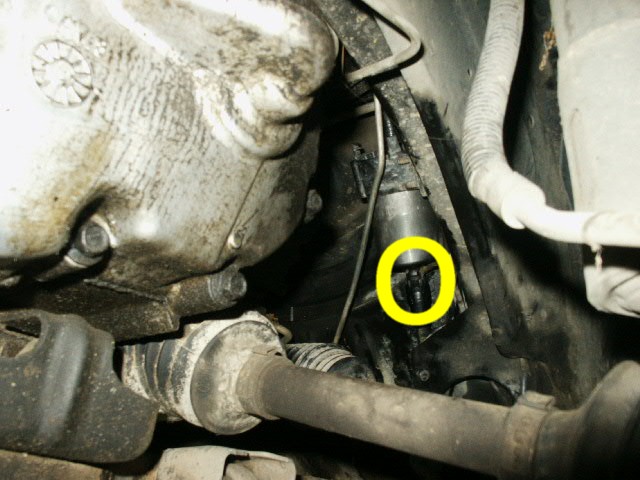
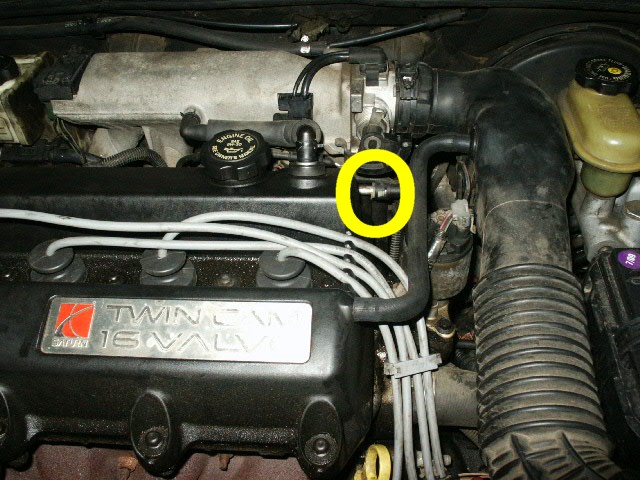
Go into the engine bay and unplug the top side of the filter line.

-
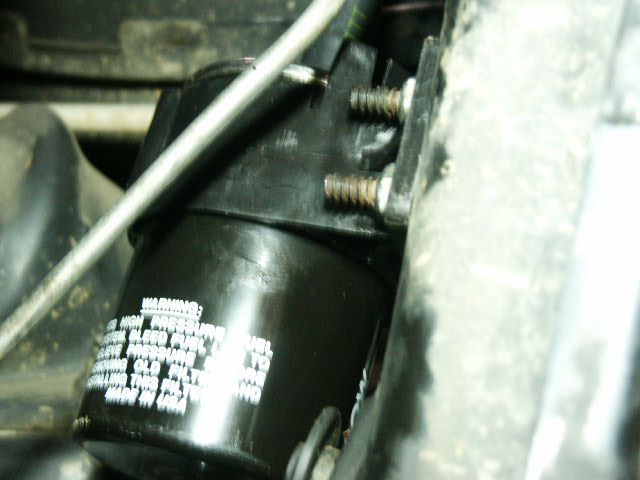
Remove the bolts that hold the bracket. 10mm

-
Remove the lines that are clipped in the bracket. They are just pressed in.
-
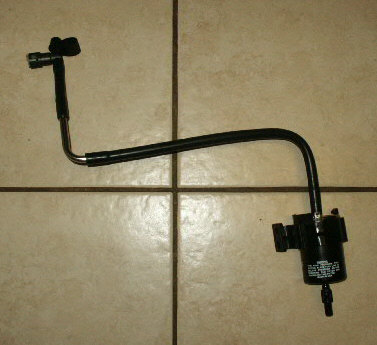
Remove the filter, I just dropped it through the bottom.
-
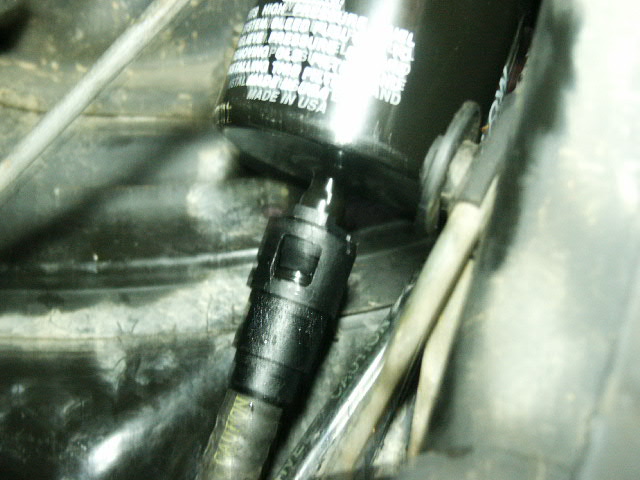
When installing the new filter, just press the lines in place and they will click and seal.

-
Attach the top connection to the motor.
-
Route the lines through the filter bracket.
-
Secure the bracket.
-
Attach the lower supply line.

-
Start the car to make sure you don't have a leak. It may take a up to 10 seconds to start (it has to build up fuel pressure).
-
Remove the jack stand.
-
Install the wheel and snug the wheel bolts.
-
Lower the car.
-
Tighten (torque) the wheel lugs.
-
Install the hub cap.

Please leave a tip, see the bottom of this page.
End of instructions.