Technology Instructions
Click here to return to
the home page.
Xerox Phaser 8200 Heater Repair - Replacement - TechnologyInstructions.com
NOTICE
These instructions are offered "As Is" and at your own risk. AtTheTipWebs.com,
any of our staff members, affiliates, etc. are not responsible for any problems
that may occur as a result of the use of these instructions, tips, procedures, etc., nor do we offer any support of any
kind by phone, visit, or by e-mail, etc. By using these instructions, tips,
procedures, etc., you accept all
responsibility and liability for the results that occur.
Xerox Tektronix Phaser 840/850/860/8200 Drum Heater
Replacement Instructions
These Xerox Phaser printers have heaters in them that warm up the printer and
aid in melting the ink sticks for the printer to work. They call them thermal
heaters or some sort of technical name like that but the fact of the matter is
they are simply Halogen flood light bulbs that you find at any full supply
hardware store like Home Depot, Lowe's, etc. I'm not sure if all the bulbs are
of the same wattage but the ones in the 8200 model are 150 watt. It takes two of
them and they cost about $6 each.
The instructions below are written by me so I think you will find them to
be in plain English. I have no college degree and have not been to any
extensive tech geek school so most people will understand my instructions.
When I first ran into this problem with my printer I did some research, took
my machine apart about 5 times, broke a thing or two so I think I can help
you avoid repeating my struggles. I guess I should say that I am not a Xerox
technician and do not warrant these instructions to be full proof so USE
THESE INSTRUCTIONS AT YOUR OWN RISK! There you go, have fun. I'm a little
slow so the entire process took me 2-1/2 hours the first time and 1-3/4 hour
each time after that.
WHAT YOU WILL NEED:
- Two double ended 150 watt halogen bulbs.
- One T-15 star tip screwdriver (or the bit).
- One T-20 star tip screwdriver (or the bit).
- One strong paperclip.
- Optional: One pair of rubber gloves to avoid touching the light
bulbs.
- You can also use the actual repair manual pages for these
procedures,
click here.
INSTRUCTIONS:
- Power the machine down properly. Make sure it turned itself totally
off before you start. If you fail to do this the inside may not be
parked properly and you will have problems getting stuff out of the
inside.
- Unplug the machine. An electrical jolt may not have the same affect
as a cup of coffee.
- Remove the paper tray.
- Flip down the front panel that allows you access to the waste
tray/maintenance kit.
- Remove the maintenance kit by pulling it out. Set it somewhere on a
level surface and keep it level.
- At the top corners of the opening you will see one screw on each
side, remove them.
- Reach around to the rear of the printer and remove the two screws
you find for the side covers near the top of the printer.
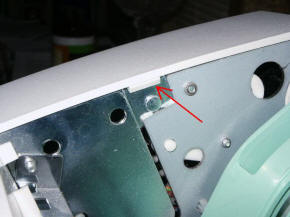
- Once you have those 4 screws removed you can remove the covers by
lifting them off. It helps to lift open the top panel kind of pry up on
the clip at the top of the printer then push out at the top. Once the
top is loose the lower edge lifts off, almost falls off.
- Disconnect the head tilt spring on the left side.
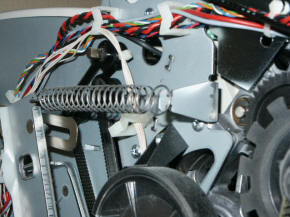
- Take the feed drive belt loose from the lower gear on the left side.
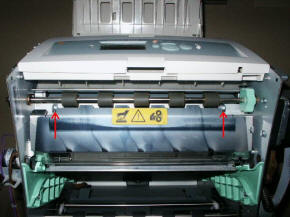
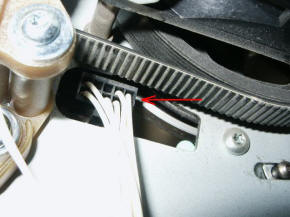
- Remove the clip from the upper feed roller clutch and slide it off
the shaft (photo above). I just let it hang by it's wires while I did
the rest. Remember it has that slot in the end of it that has to fit
over that metal bracket when it goes back on.
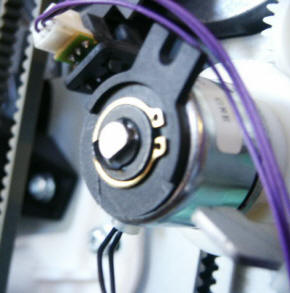
- Slide the gear off the shaft. It has a slot in the otter edge of it
that needs to slide over the bracket.
- With the front panel open, remove the two screws that hold the
chrome duplex guide, and remove the guide.
- Remove the left side maintenance drawer guide. Remove the one screw
at the front, then pull guide away from the metal frame about 1/4" then
push it back a little.
This action will cause it to fall in so you can pull it all the way out
of the machine.
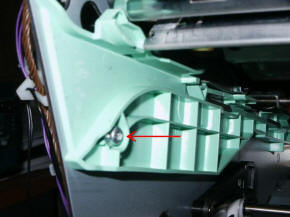
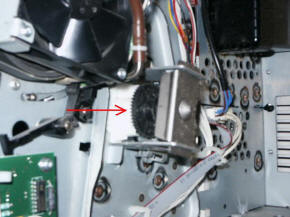
- The right side is a little tricky. If you look way back under the
machine you will see a large roller at the right side that is actually
in the way of the right guide coming out. On the outer right side of the
machine you will see a gear behind a metal guard, turn that gear counter
clockwise several times to get that roller to move to the left, out of
the way of the guide.
Once you have that roller moved to the left, remove the screw that holds
the right guide and remove the right maintenance tray guide. Remember to
pull the front edge of it away from the side before you push back on it
a little to free it for removal.
WARNING: The next step should be done with extreme
care. There is a small paper feed sensor that can be broken if you do
not watch it.
- Remove the upper feed roller assembly. This is done by removing the
screw on the right.
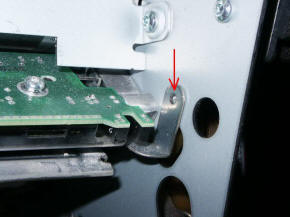
Then unplug the electrical connector on the left, remove the shaft clip
from the left edge of the shaft. It is a little hard to reach so I used
a bent standard paperclip (the paper clip was a medium size one, not the
very small one).
NOTE: When you remove the clip you will
notice a brass bushing on the left side that needs to go back the way it
is when you put the printer back together.
You can now remove the unit by carefully holding the bottom of this
assembly with both hands, slide it to the left about a 1/4 of an inch
then slide the right end out, and then slide the left end out of the
hole.
NOTE: Set this assembly down carefully.
There is no need to take it apart. It does have that fragile paper feed
sensor in it so try not to break it.
- From the right side of the printer, unplug the heater assembly. If
you look into the machine you will see it at the right, it is a brown
connector with about 7 wires going into the plug.
- From inside the printer, remove the two larger screws that hold the
heater assembly in place.

They have larger screw heads like the exterior side panels. Do not
remove the smaller inner screws. Once you have the two screws removed
take the heater assembly out.
- NOTE: Figure out a way to replace
the bulbs without touching the glass parts with your fingers (you can
use surgical or rubber gloves). The oil from your hands will effect the
life and performance of the bulbs (have fun doing that, I had a hard
time just getting them out of the package without touching them).
Replace the bulbs and put the printer back together.
ASSEMBLY TIPS:
- Step 16: While replacing the upper feed roller assembly you will
notice that there are actually two shaft brass bushing, one on each side
that will need to be aligned and seated properly for the assembly to be
properly installed.
- Step 15: When you put the printer back together, do not worry about
turning the gear back to the far right. The printer will re-set that
itself when the power is turned on.
- Step 14: Whey you install the left maintenance guide, you may have
to turn the gear on the right side of the printer clockwise a little to
get the guide to fit back in it's slots.
Please leave a tip, see the bottom of this page.
End of instructions.
This page was last modified on
07/30/2010
I hope these instructions were helpful to you. Please take a minute and leave
me a donation, yes I do need it.
Click Here.