Dash Cluster Removal for the Volvo 850

These instructions will guild you through the process of removing the dash cluster for the Volvo 850. There are 2 different clusters found in the Volvo 850, the Yazaki and VDO. The one pictured above is the VDO. The Yazaki cluster has a different trip display, each digit of the trip display has it's own window frame, they are not grouped together like this cluster. Another way to tell is that the Yazaki cluster has the trip odo under the regular odo numbers.
There are several reasons you would need to remove the cluster. The most common being that the odo has stopped and you need to replace the gears. Another being that you need to replace light bulbs. It may be possible to replace a couple of the bulbs without taking the cluster out but I have found that it's much easier to remove it. Less chances of damaging something else in the process. What ever the reason is, be sure to check all the bulbs and replace burned out bulbs while you have it out (or replace all of the bulbs).
The best way to remove the cluster is to remove the dash pad. Some people take the left half of the pad loose and squeeze the cluster out of the lifted space but doing so leaves the risk of breaking the dash pad, dash or cluster mounts. Just remove the dash pad and avoid breaking anything.
Tools Needed:
| No tools needed. | See Dash Pad Removal, Volvo 850 |
If you are going to remove the cluster, be sure to check all the light bulbs and replace any that are burned out while you have it removed.
Instructions:
-
Remove the dash pad. Click the link for those instructions, then return here.
-
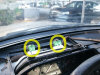
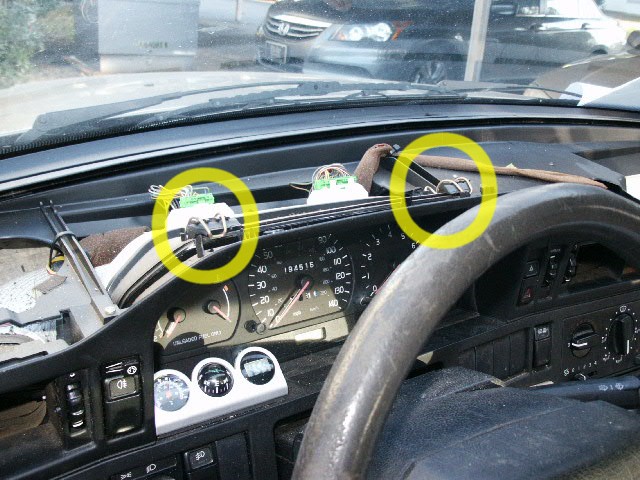
Once the dash pad has been removed, unclip the top clips from the cluster.

-
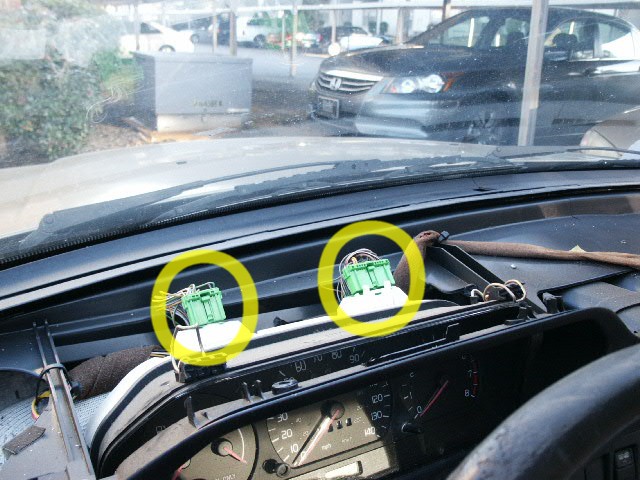
Unplug the electrical connectors at the top of the cluster.
NOTE: DO NOT lift the cluster away from the dash at this time. If you have a turbo boost gauge or a trip computer, you will need to unplug those items as well. -
If your cluster has a trip computer, unplug the wire that goes to the switch.
-
If the car is turbo and has a boost gauge, unplug the boost gauge vacuum line. It is rubber and is likely hard to remove. Be careful not to brake the back of the cluster. I usually remove the lower dash panel and take the lower end of the vacuum line loose to avoid doing damage to the back of the cluster.
-
Now it is safe to lift the cluster from the dash.
-
When you look at the back of the cluster, you will see the light bulbs that are attached to the back of the cluster. They simply turn 1/4 of a turn to release from the cluster.

Yellow - Standard Backlight Bulbs. There are 4 of them.
Orange - Flasher/Turn Signal Bulbs. Two of them.
Blue - High Beam Bulb. One of them.
Purple - Clock/Temp/Trip Display. May have 2 bulbs.
Red Area: Warning Bulbs. There are several of them and there may be blank spaces that were intentionally left blank from Volvo. If the car was not built with the warning system the bulb was left out.
Please leave a tip, see the bottom of this page.
End of instructions.