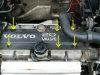
Head Removal and Installation, Volvo 850 / S70 Turbo B5234T, B5254T, Head gasket replacement, valve replacement
Just finished doing a head gasket job on our turbo S70 GLT. The main
two reasons for you to do this job is to have valves replaced or you
have a bad head gasket. Our car had the strangest head gasket leak, one that was new to me.
Before going through the hassle of doing a head job, it would be a good
idea to do a compression
test to make sure you have a good motor. Doing a head on a bad
motor would be a bad waste of time and money. You can
skip the story if you'd like.
A few months ago my daughter called (from out of town at college) and said that she was
having coolant problems. When she started the car, the low coolant light
would be on. Then she would drive and the light would go out within
minutes. When she call it had been going on for about a week, so
I told her to check the reservoir while the car was cold, and if it was
low, add some while it was cold. So she went and picked up some coolant
and needed to add some. This went on for weeks, weeks turned into
months. About 5 months into this cycle she came home for the summer.
Right off I didn't have a chance to check it out and a few weeks later
she went on a road trip 550 miles away (same weekend I was taking one
750 miles away). So, I told her to check the level before she left and
top it off, and stop every 200 miles and let it cool down and top it
off. Off we went and no, she didn't top it off. 4-1/2 Hours into our
trip (we left home within a hour of each other) she called me and
informed me that she has stopped on the side of the
road because the car started to overheat. I had always told her, if you
ever see that needle going towards the red, stop immediately and turn the
car off. If you don't, it will overheat and destroy the motor. So, it
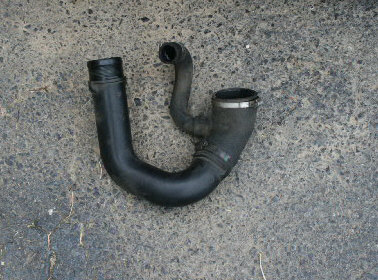
was out of coolant and the overfill line from the reservoir to the thermostat
was split. She added bottled water and drove to the nearest AutoZone
at 45 mph. Hose replaced, coolant filled, and off she went, no more
problems at all (other than the coolant getting low every few hundred
miles). I believe God had mercy on us and maybe using full synthetic oil
helped as well. She got back home fine and a few days later I test drove
the car. Before starting cold it was at the min mark. After driving 6
miles it was at the full mark. After driving another 3 miles it was
above the full mark and the reservoir looked stressed. After another 5 miles
coolant was escaping from the reservoir cap (which was the green one). That's not right.
After
speaking to several mechanics I came to the conclusion that there was a
small breach in the head gasket. Combustion / exhaust air was getting by
the head gasket, into the coolant system and forcing the coolant into
the reservoir and out the cap, leaving the block without coolant (if
none was added regularly). There was no oil in the coolant, no coolant
in the oil. My guess is that many head gasket leaks start this way and
people keep driving until the block is dry and it cracks, or totally
blows the gasket (fluid mixing, smoke, etc.). So, I decided to replace
the head gasket before she missed a refill again and destroy the motor.
(After thinking about this again recently, I think I remember adding
coolant to this car for a year or two. Started off a cup every other
month, then once per month until it gradually turned into what I
described above).
I'd like to start off by thanking Tracy for his incredible write-up
in doing a head gasket and other related item in his tutorial. His
information and instructions were priceless. The only reason I'm putting
together these instructions is to help people that want to do the head
gasket only and not be overwhelmed with other related information. I
know Tracy asked that we not be overwhelmed but I must say, I was. Just
scared because of all the related stuff. Here is Tracy's tutorial, very
good information.
Tracy's Head Gasket Tutorial
I also want to thank one of the guys on
www.VolvoForums.com. He helped
guide me through the task when I was looking for short cuts and what
not. May God truly bless you.
Ok, down to business. It took me about 4-1/2 hours to tear the head out of the car. It took me 3 days to get it back together, mainly because I was not properly prepared for the job and I was working in the parking lot of an apartment complex in 100+ degree weather. Every time I had to take a break or run an errand (or deal with some other life issue), I had to pack everything up and unpack everything when I resumed. My guess is that it would have taken me 3 hours to clean up the parts and another 7 hours to put it all back together. With the right tools, equipment, and no real distractions, a first timer may be able to do the complete job in 12 hours. A slow poke like me, 14 hours. The job cost us about $850. My shop expense was $423.15 plus about $60 in gas going back and forth to the machine shop. I must say that the job was a lot cleaner than I expected. I believe improper installation was what caused our head gasket to go bad. It looked to me like it had been done maybe a year before we purchased the car.
Tools Needed:
Here is a complete list of tools, supplies, parts and equipment that I needed to do the job. I'm considering putting together a tool kit that I can lease out for $20 to anyone that needs it. This kit will consist of tools that most people may not have and will only use once. My guess is that I have about $120 worth of tools that would be used to complete the job.
| Sockets, 1/4" drive: 6mm, 7mm, 7mm deep, 8mm, 8mm deep, 9mm, 10mm, 10mm deep, 12mm | Ratchet Wrenches: 1/4", 3/8", 1/2" |
| Sockets, 3/8" drive: 10mm, 12mm, 13mm, 14mm, 14mm deep, 17mm, Spark plug socket | Ratchet Extensions: Short 1/4", Long 1/4", Short 3/8", Long 3/8", Long 1/2" |
| Sockets, 1/2" drive: 30mm | Ratchet Adapters: Swivel 1/4", Swivel 3/8", 1/2" to 3/8" |
| Speed handle | 8" C-clamp |
| Hammer | #7 Allen wrench |
| Torque Bits: T25, T30, T40 | Foot lb torque wrench |
| Flat tip screw driver, medium | Inch lb torque wrench |
| 4 Spring clamps | Angle torque meter |
| Head gasket kit (I got mine from iPd - Included, head gasket, exhaust manifold gaskets, exhaust to pipe gasket, several intake manifold gaskets, spark plug hole seals, valve stem seals, oil cap seal, thermostat seal, water pipe seal, thermostat housing seal, intake and exhaust cam seals, and a mystery seal) | 12 Head bolts (I got mine from AutoZone) |
| Anaerobic sealant (gasket maker for putting the top of the head back on. I got mine from NAPA, if you can, get the OEM Volvo stuff) | Gasket remover |
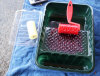
| Small foam roller | Small roller pan (will likely come with the roller) |
| Brass wire brushes | Plastic scrapers |
| Acetone | Coolant, straight 100% (Get the OEM Volvo stuff if you can) |
| Shop towels | Shop paper towels |
| Degreaser cleaner | Throttle body cleaner |
| Lint free rags | Jack stands |
| Jack | Lug nut wrench |
| Drain pan | Distilled water |
| Throttle body gasket | Box end wrenches: 17mm, 13mm, 12mm |
| Serpentine belt release tools. * | White-out paper correction fluid (to mark the cams for timing) |
| Timing belt tensioner pin (a small paneling nail should work) | Magnet |
| Plastic scrub pads. |
Tools Used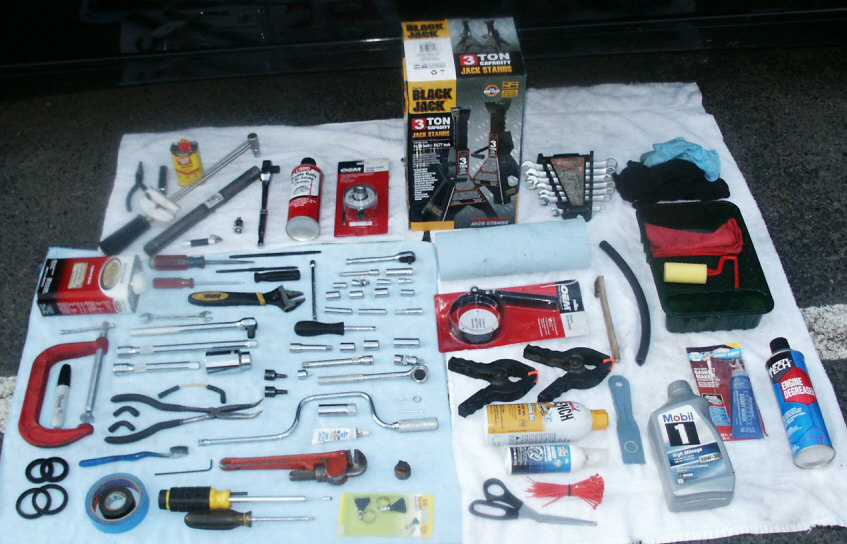 |
Angle Torque Tool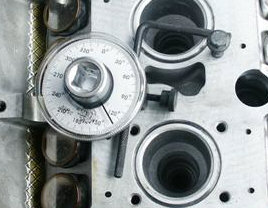 |
* Serpentine Belt Took Kit Click here for purchase information. |
Anaerobic Sealant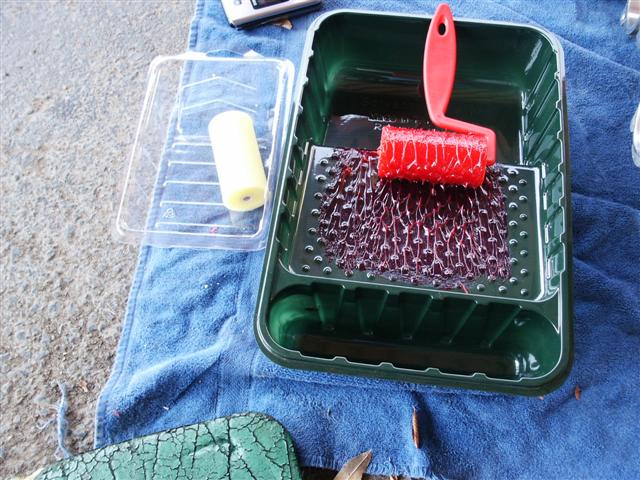 |
Gasket Remover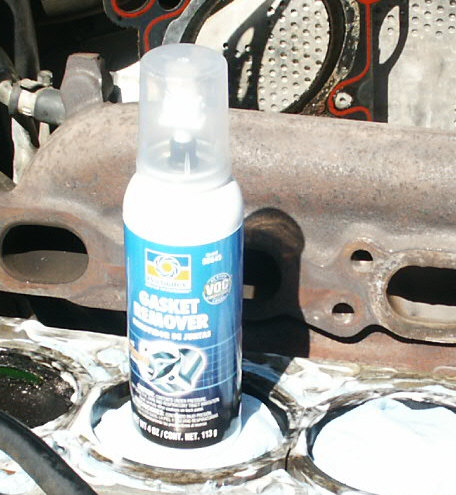 |
Where I stored
things while and between working on it.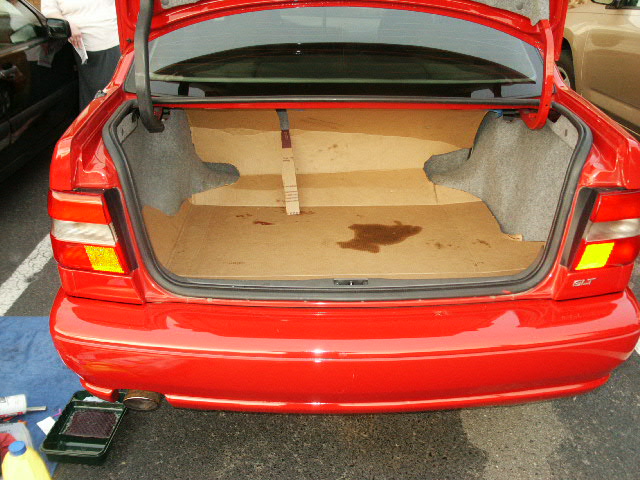 |
||||
Instructions:
NOTE: Remember, some of these instruction steps are turbo specific. If your car is NA, skip those steps.
-
Park the car on a good level surface.
-
Set the parking brake and/or chalk the rear tires.
-
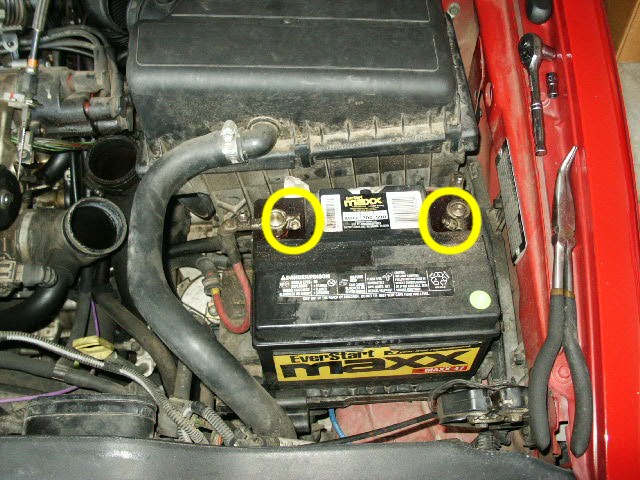
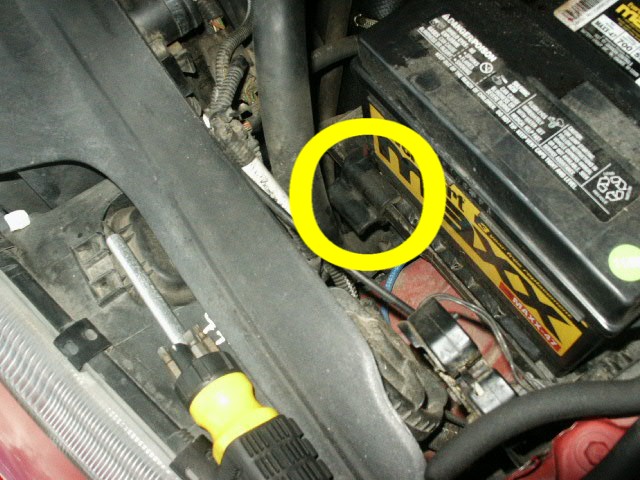
Remove the battery, 10mm. It also has a plastic clip on the tray.

-
Drain the coolant from the radiator. There is a 13mm drain plug on the drivers side edge of the bottom of the radiator. I opened it (the plug should be loosened, not removed) and loosened the reservoir cap. Only about a gallon will come out.

-
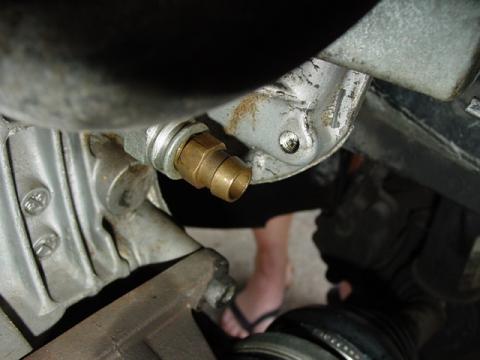
Drain the block if you'd like. There is suppose to be a drain on the block near the water pump, pointing rear. I did not try to drain the block.

-
Remove the timing belt cover. One 12mm bolt on the passenger side of the car, hides the cam sprockets and timing belt.
-
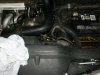
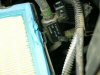
Remove the intake air scoop. Goes from the top of the radiator fan scrod to the lower portion of the air box. It just pulls out, push the top forward end of it towards the firewall and work it out.
-
Disconnect the MAF from the intake tubing and the wire plug.
-
Unplug the coil wire.
-
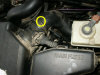
Remove the air box. Disconnect the rubber hose from the front top 7mm, and leave the MAF connected to it. The air box has 2 studs on the bottom of it on the motor side that you lift it up from, the finder side has a prong that goes through a bracket into the finder area. There is also a coil wire attached to the back side of it and a small wire harness clipped to the back edge closest to the brake fluid reservoir, it lifts out. I did NOT remove the top of the box, just remove the entire thing.
-
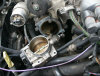
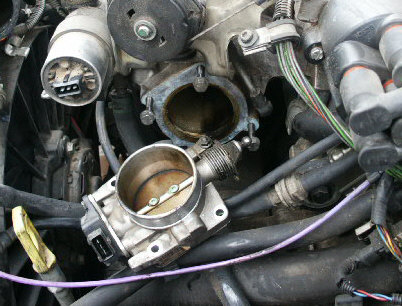
Remove the throttle body cover if the car still has one. It has 1 T25 screw in it.
-
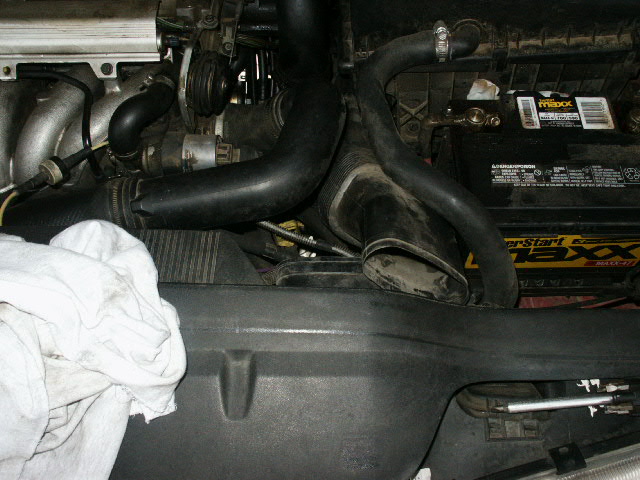
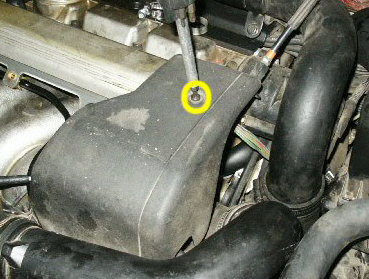
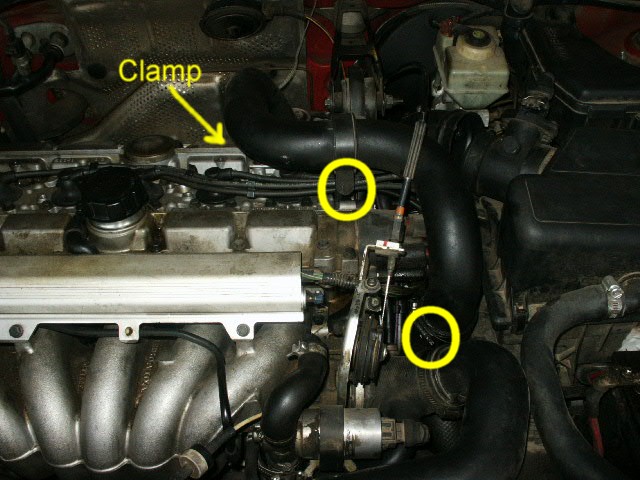
Remove the turbo intake pipe. It has a 10mm bolt dead center, a clamp on the back and a clamp on the front, 7mm I believe.
-
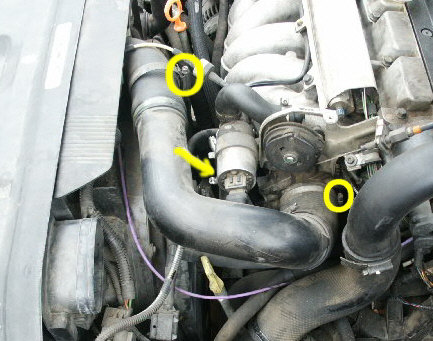
Remove the throttle body intake tubing. It has a clamp on the throttle body, clamp to a tube at the top of the radiator and a clamp on the bottom of the idle control valve.

-
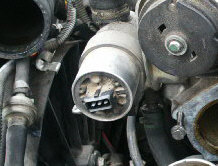
Unplug the idle control valve.

-
Unplug the throttle body switch.
-
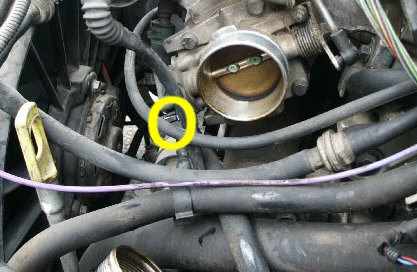
Undo the vacuum lines to the vacuum tree next to the throttle body.

-
Unhook the throttle body linkage.
-
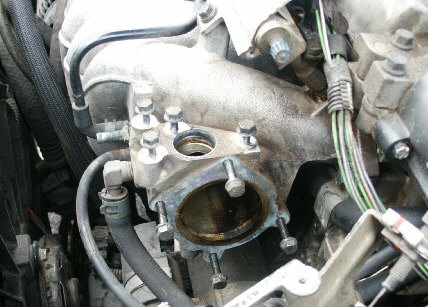
Remove the throttle body, 4x 10mm.
-
Remove the screw that holds the fuel rail wires to the throttle body cable bracket assembly. 1x T25
-
Remove the 4x 10mm bolts that hold the idle control valve and throttle cable assembly to the manifold and swing the entire assembly to the side where the air box was sitting. I just let the entire assembly sit there till I was ready to install it.

-
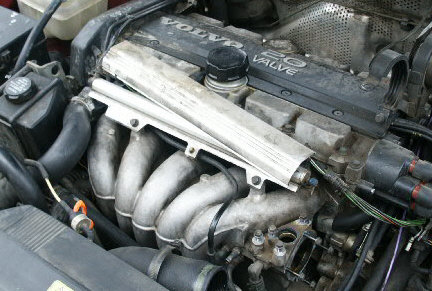
Remove the fuel rail cover. I just pulls off from the top of it, hinges towards the front of the car. Jerk the top and it will come right off.
-
Remove the fuel rail. Undo the 17mm supply line connection, 2x 10mm rail to manifold bolts and the return line clip that holds the line that connects into the manifold. Once you have it loose unplug the rail from the manifold and swing it near the throttle cable assembly out of the way.
WARNING: When removing the fuel rail, do you best to pull it straight out and up so you don't damage the fuel injectors. You will likely have to work it out.
-
Remove the spark plug cover from the top of the motor. 6x T30.
-
Unplug the spark plug wires, leaving them plugged into the distributor cap.
-
Remove the spark plugs and store them where they won't get damaged. I set mine near the vents in front of the windshield.
-
Remove the bracket for the fuel line near the back side of the timing belt cover. 1x T25
NOTE: Once I disconnected the fuel lines from the bracket, I pushed them around a lot to finish my job. Not a suggestion, just letting you know what I did.
-
Remove the air intake for the ECU box.
-
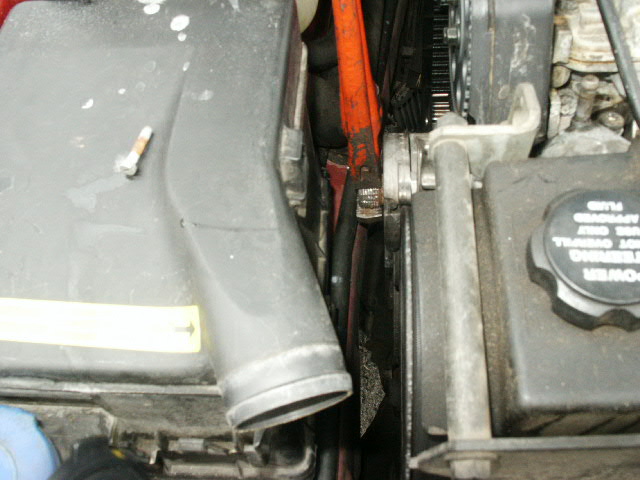
Take the tension off the serpentine belt, pin the idler and remove the belt. It's hard to crank the cam shaft with that belt on the crank.
NOTE: Make sure you make a note as to how the belt came off so you can get it back on easy.

-
Remove the right front wheel and install a jack stand under the frame.
-
Remove the plastic nut that holds the wheel skirt in place over the crank.

-
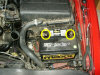
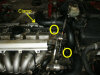
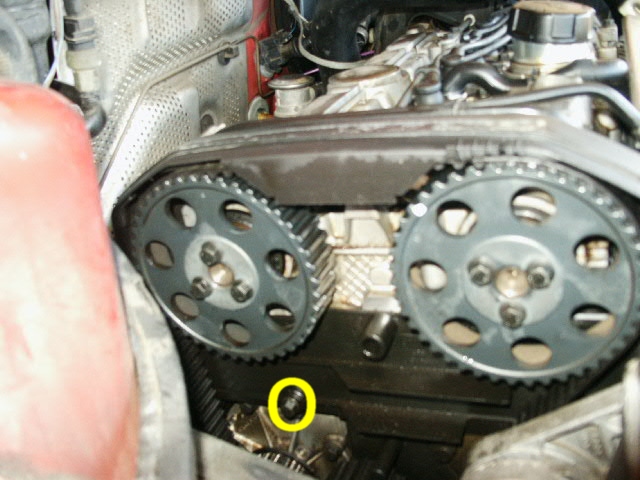
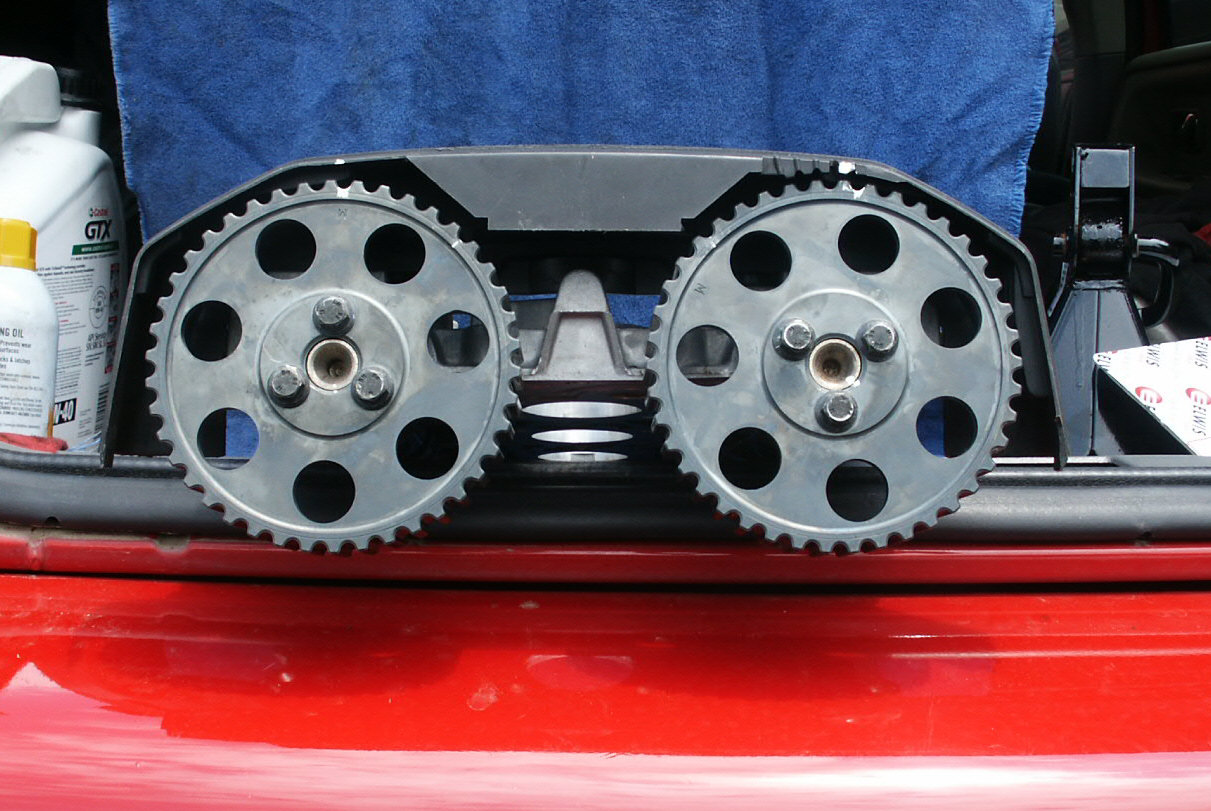
Align the timing marks on the cam sprockets to the top of the timing belt cover by turning the crank clockwise with the 30mm socket.
-
Mark the timing marks on the cam gears. I put 2 marks on each sprocket, one at the mark and another one at the top of the gears onto the cover. I used white-out paint. Quick, easy, dries fast.
-
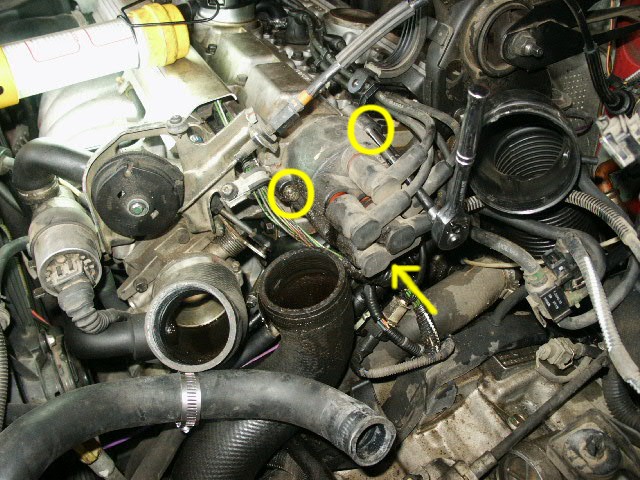
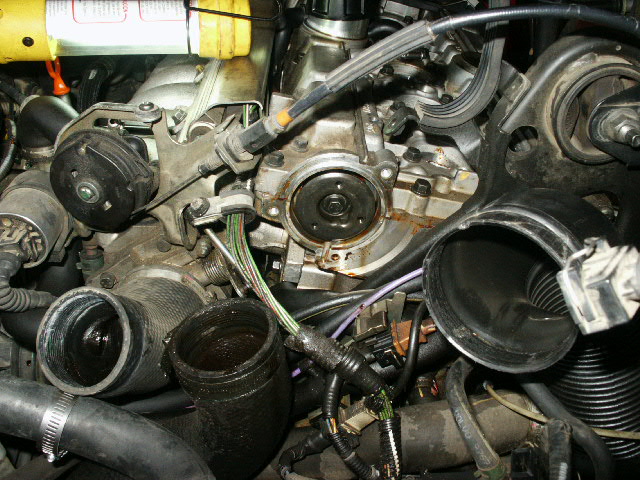
Remove the distributor cap with the wires attached. Mine had flat tip screw driver bolts.

-
Remove the dust cap that was behind the distributor cap.
-
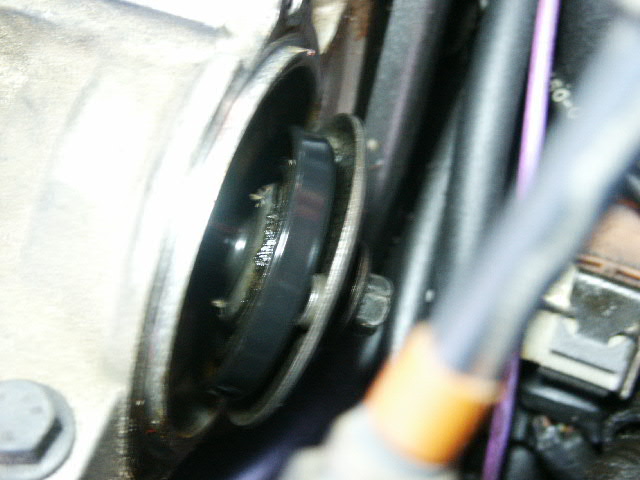
Remove the rotor, #7 Allen (1/8" hex screws). I had to gently tap my Allen wrench in a hammer.
-
Remove the rear intake cam adapter that was behind the rotor. 10mm bolt.
-
Move the inlet tube out of the way. It has 2 vacuum lines attached to it that I unplugged so I could move the tube around and not totally remove it.
-
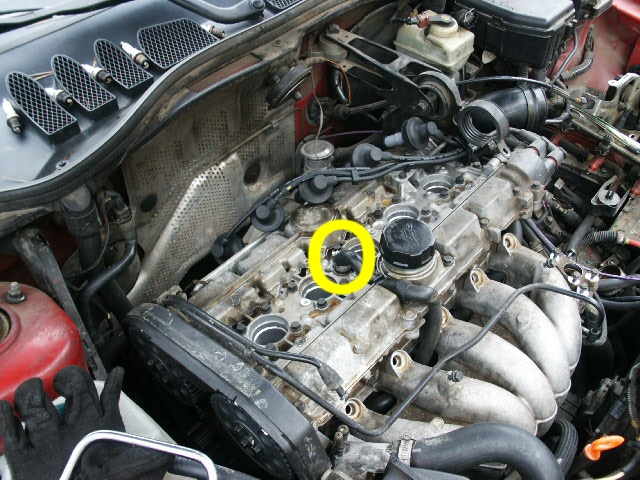
Unplug the cam position sensor. Be gentle, some of those things are fragile.
-
Remove the cam position sensor. 2x T40 bolts. The lower bolt also holds a bracket in place that secures the PCV tubing.
-
Remove the adapter that was behind the cps. 10mm bolt.

-
Remove the bracket that holds the turbo inlet tube clamp and secures the top of the head to the upper torque brace. 2x 10mm and the side of it has 1x 13mm nut.
-
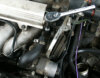
Remove the bolt that holds the upper torque brace to the head. 1x 14mm.
-
Remove the top radiator house and thermostat housing top. I left them attached to each other. The hose has a clamp to the radiator, 7mm and the 2 bolts that secure the top of the thermostat housing are T40. Some people remove the hose and leave the top of the thermostat housing attached till later. I think it's in the way of the intake manifold bolt so I remove it now.
NOTE: When removing the bolts that secure the top of the thermostat housing, be careful not to strip them, they strip easy.

-
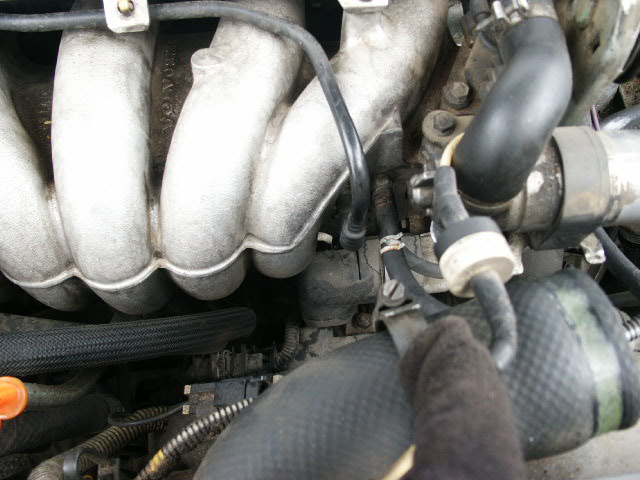
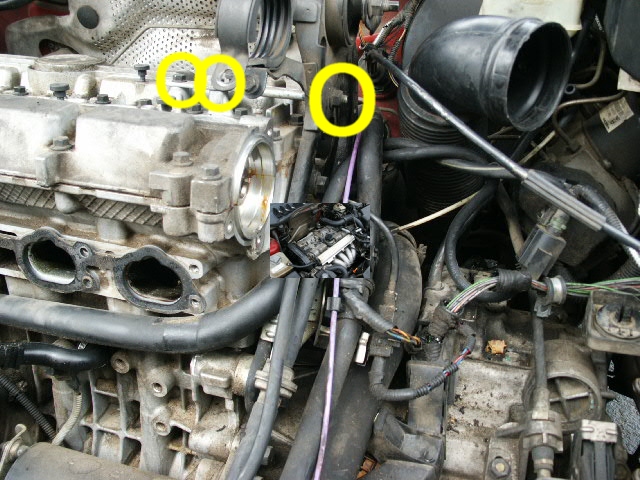
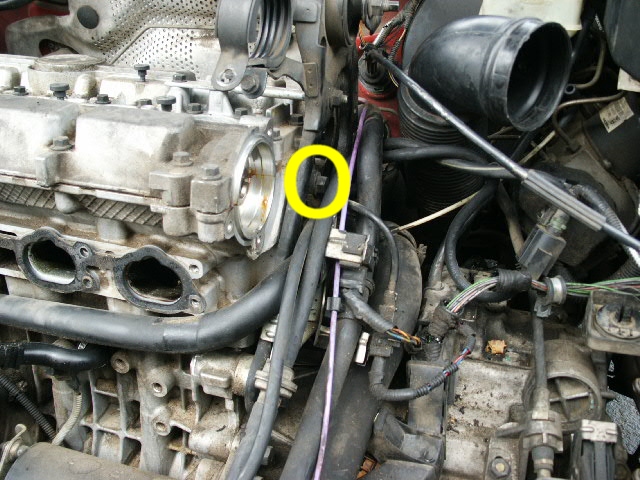
Unhook the vacuum tubes going to the intake manifold. There are 2 near the throttle body connection and one near the power steering pump reservoir, tucked in that end, part of the PCV system.

-
Disconnect the PCV hose on top of the cam cover.

-
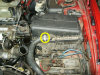
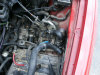
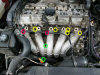
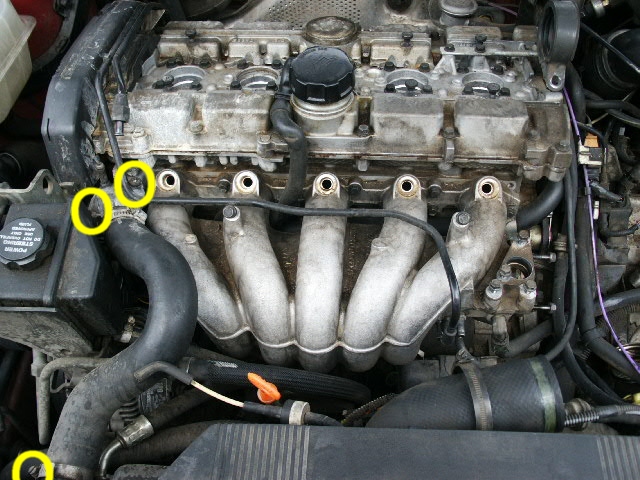
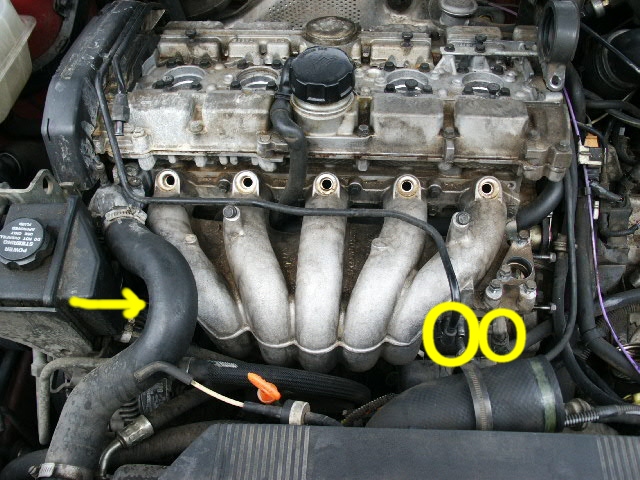
Remove the intake manifold. It has 9 bolts holding it. 7 Go into the head, 1 secures the oil dip stick tube and 1 is in a bracket under the manifold, just behind the bolt from the oil dip stick tube. I was able to get the 2 hidden bolts from the top, they are 12mm. The other 7 that go through the head are visible and are removed with a 1/4" 10mm with extensions and maybe even the swivel. The top 3 bolts have to be removed all the way out of the head while the lower 4 can be left in, just make them loose so you can lift the manifold off of them. After the manifold is out, remove the remaining 4 bolts from the head.
-
Remove the top of the timing belt cover. 2x 10mm.
-
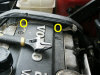
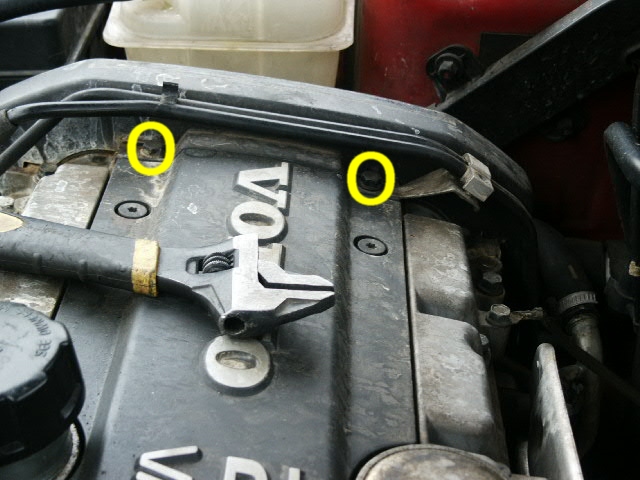
Remove the 2 rear grounding straps from the head. 2x 10mm.

-
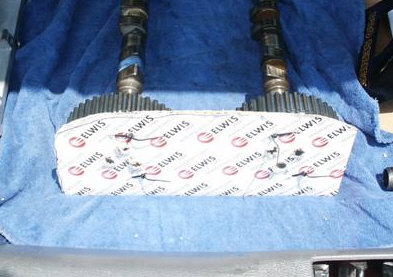
Lock the cams together so they will be in time when you re-install them (you can do this now or later, I did it later). Use a stiff piece of cardboard or some other stiff piece of material and make a plate to secure the cams together. I used a very stiff piece of cardboard and zip ties. This kept the cams aligned while out of the motor.


NOTE: This can be done in different ways. Some people lock the cams to the cam cover with a special tool, some make a tool to lock the cams to the cam cover, I just secured them to a board so they would be aligned when I re-installed them. The board also held them straight when I drew down the cam cover during installation. You can look at other instructions to see how they locked the cams to the cam cover.
If you pulled the cams already and want detailed instructions on how I secured them, click here. -
Remove the hydraulic tensioner from the timing belt. 2x 12mm bolts. I removed them from the wheel area. This will make the timing belt loose.
NOTE: After I pulled those bolts, I re-installed the wheel/tire (just snugged down the wheel lugs). -
Remove the bolt that secures the back of the timing belt cover to the head. It's hidden below the exhaust cam sprocket, about 3 or 4 inches.

-
Take the timing belt loose from the cams, only.
-
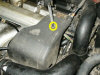
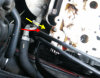
Remove the exhaust manifold heat shield. It has 5 bolts, 12mm I believe. Once you have all 5 bolts out, the back part comes out best if you feed it under the car towards the passengers seat direction. Then the front half comes out best if you lift the drivers side of it up and pivot the passenger side of it down a little and slide it towards the turbo a little, then lift it out.
WARNING: Don't cut the water supply hose like I did thinking that heat shield would not come apart unless I took it that way. May have been the 100º+ heat speaking to me.
-
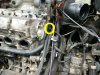
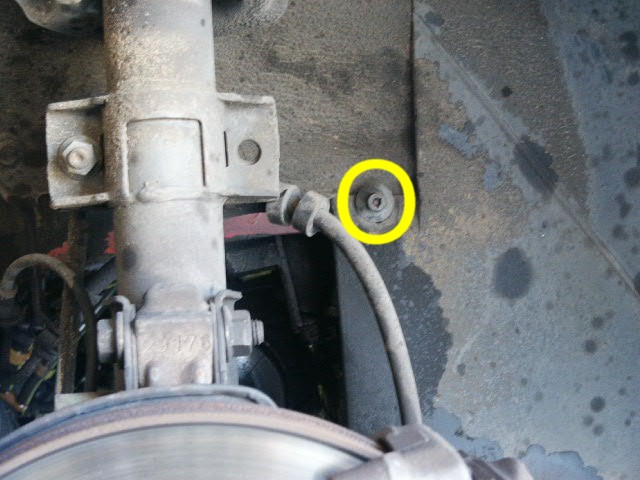
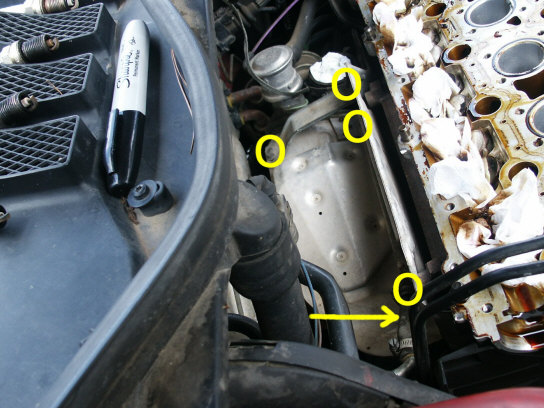
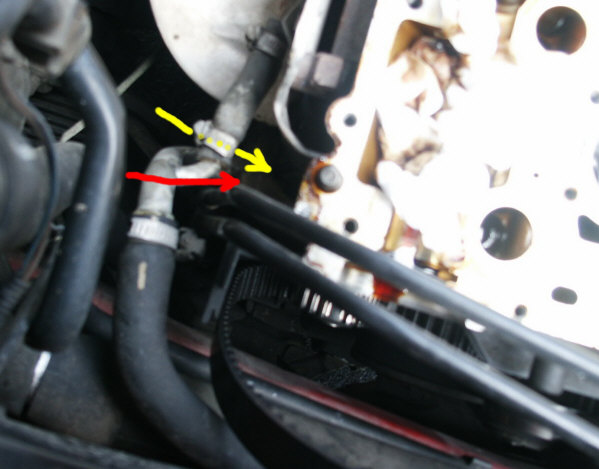
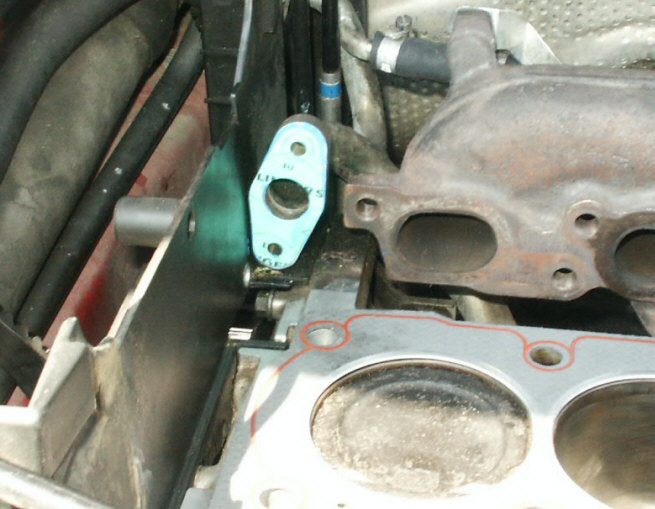
Remove the water pipe that attaches to the head on the back side nearest the passenger side strut stack. It has 2x 10mm bolts. This may be the toughest part of the job (especially going back on with the gasket).
-
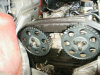
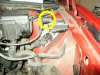
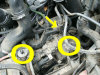
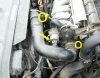
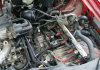
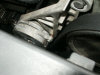
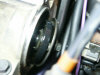
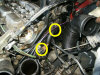
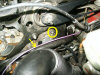
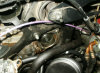
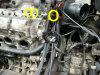
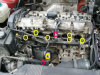
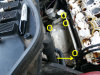
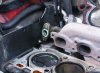
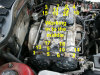
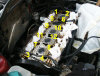
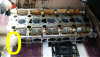
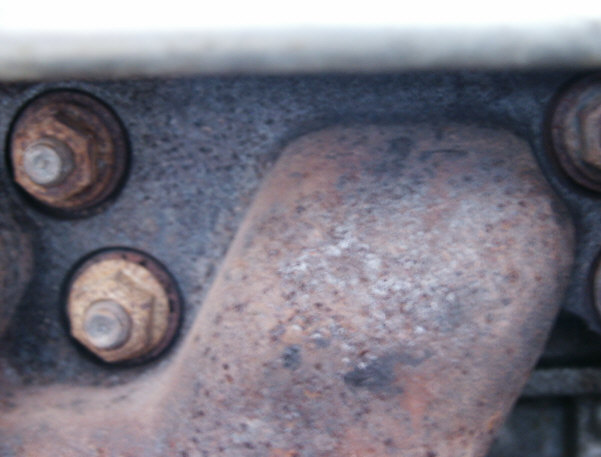
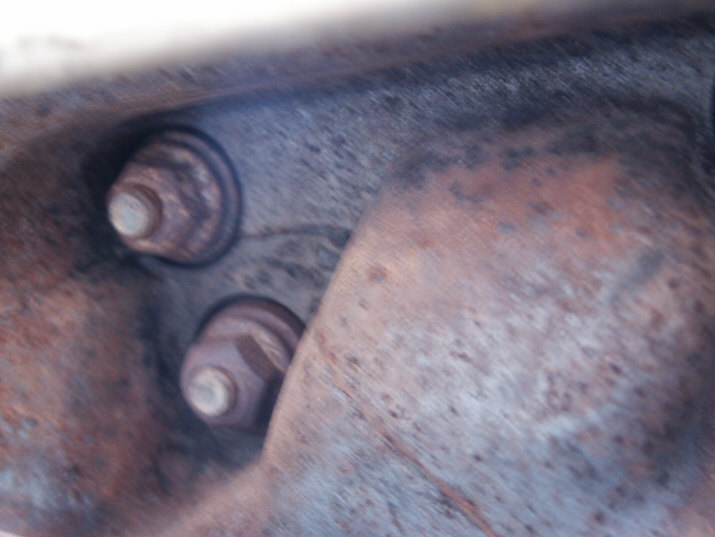
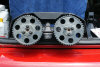
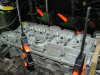
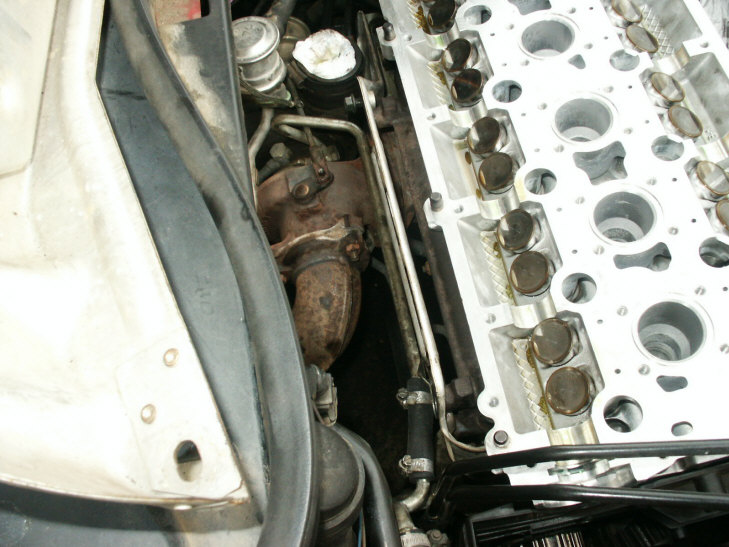
Remove the exhaust manifold bolts that are on the back of the head. There are 10 of them, 13mm. They are surprisingly close together, top to bottom. If things go well, the studs will stay in the head and the bolts will come off the studs. If not, you will need to get those nuts off the studs and out the studs back in the block. I used a pipe wrench to hold the studs and twisted the nuts off with the socket. (At this point I was cramping).
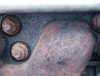
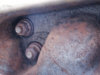
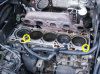
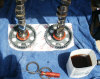
(Yikes!!! From the looks of the last picture, I have a cracked exhaust manifold). -
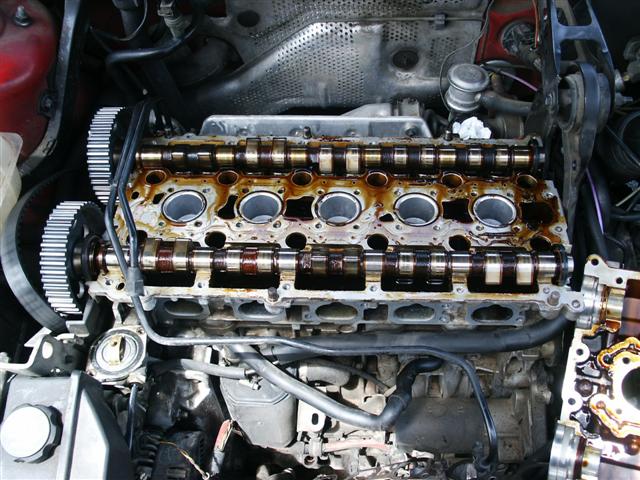
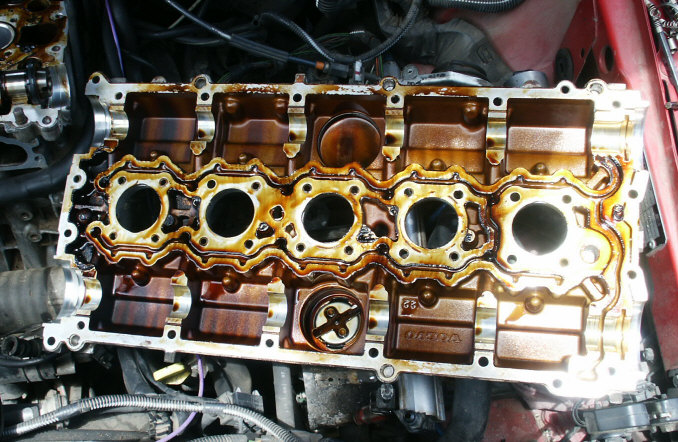
HURRAH!!! Time to remove the cam cover. It has 40 bolts in it. It's glued down with it's gasket making sealant (anaerobic sealant) and it has those 40 bolts. It was suggested that the bolts be removed in a staggering pattern staring from the outside working in. I don't think it matters since the cover is glued down and has to be pried apart. So I removed them in a staggering pattern. I loosened all of them first, once they were all loose I finished removing them. I loosened 2 on one end and 2 on the other end, matching screws and working my way in to the middle (as suggested). When I started, I loosened all of them about 1/2 turn, all of the bolts in that pattern. Then went back and did another 1/2 turn. By then all of them were loose and I took them out.
-
Once all of the bolts are out, find the taps and pry the cam cover off the head. Try to use pry points at a time. I used 2 ratchet extensions.
WARNING: DO NOT PRY ON ANY OTHER SECTION OF THE COVER. DO NOT BE TEMPTED TO SLIDE A SCREW DRIVER BETWEEN THE CRACKS ONCE IT STARTS OPENING TO GET IT OPEN FASTER. ONLY PRY THE SEPARATION TABS.
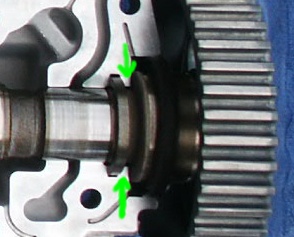
WARNING: When you separate the cam cover, watch the way you take it apart. You should only lift it straight up or hinge it front (grill) to back (windshield) or back (windshield) to front (grill). If you lift the cover off any other way, you will likely damage the cam lip lobe(s) in the cover or head (the cams have lips on the front end that sit in groves in the soft aluminum head. If you open the cover by lifting the rear seal area end up it will cause those lips to cut into the cover and chip/break the groves).


WARNING: Do not damage the head or cam cover when you separate them (by dropping the cover, prying between the surfaces or lifting the cover off on an angle).
WARNING: When you get the cam cover loose, pay attention as to where the cams are and what they are attached to. I made sure they were NOT stuck to the top but lying on the head. You don't want them to fall and get damaged. -
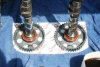
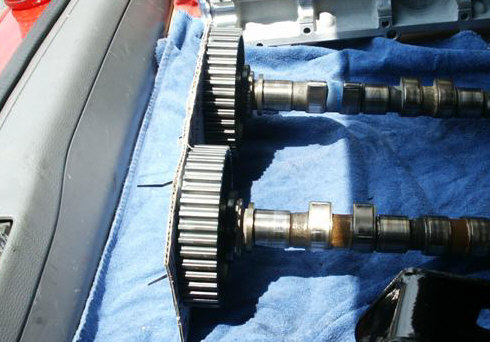
Remove the cams, with sprockets attached, and put them somewhere where they won't get damaged and will stay clean. If you did not lock them with a system like shown above, make sure you do not get them mixed up, exhaust and intake.
WARNING: Be careful when you lift them out of the head, not to damage the lobes. I think it would be safe to lift the sprocket ends out first, then the rear ends out.
NOTE: The seals can be removed at this time if you'd like.
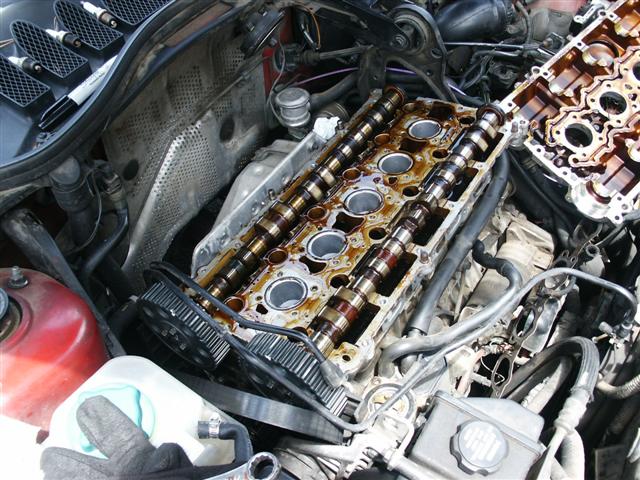
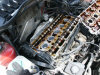
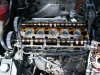
NOTE: You can now see the lifters. They can easily be removed with a magnet. When they are removed you can see the top of the valves. -
Clean up as much of the oil as you can. You don't need oil getting everywhere when you lift the head off the motor.
-
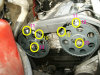
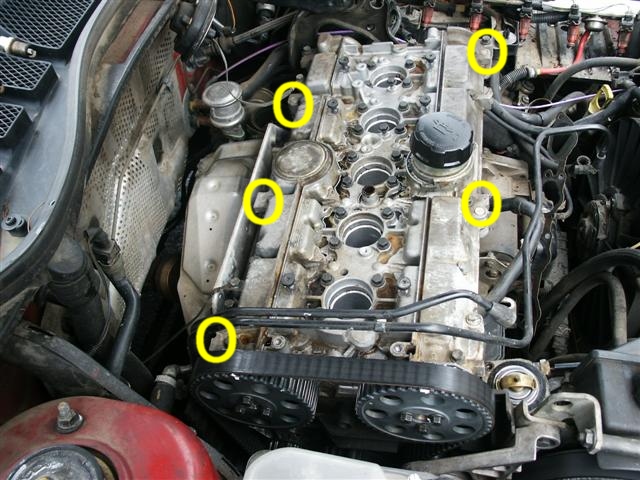
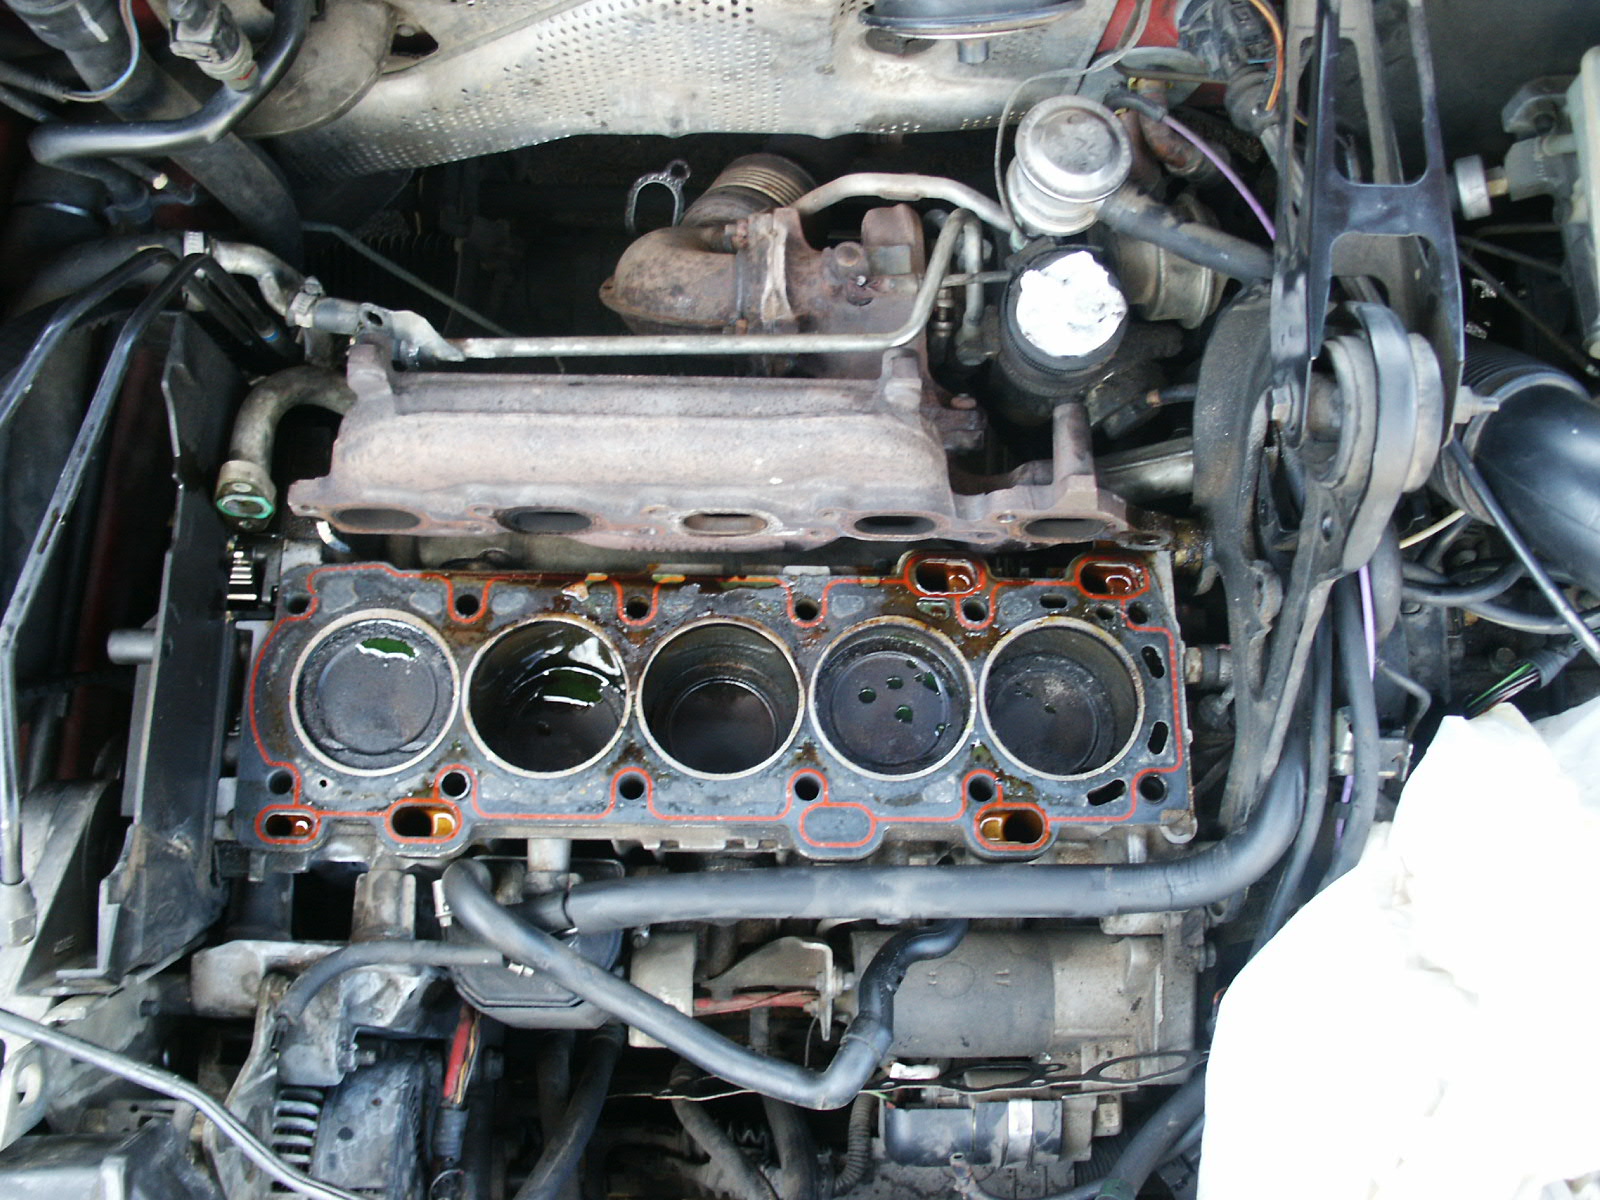
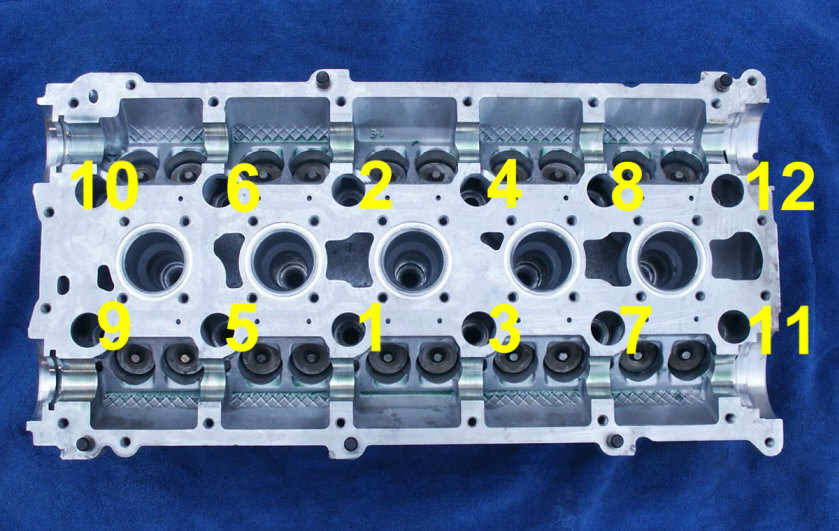
Now you can remove the head bolts. It is critical that you remove these bolts in a certain pattern to avoid warping the head any more than it already is. There are 12 bolts, 14mm. They are so tight that I thought I was going to break my socket breaking those bolts loose.
So, starting at the end, loosen the first bolt 1/4 turn. Then do the same to the bolt beside it. The go to the opposite end of the head and do the same thing, 1/4 turn. Then go to next pair of bolts at the other end of the head and do the same. Go back and forth until all 12 bolts are loose 1/4 turn, then start the process all over. By the time you get to the 3rd for 4th rotation, the bolts will be loose enough to just take them the rest of the way out.
-
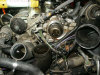
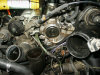
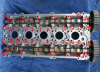
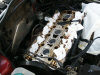
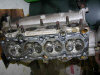
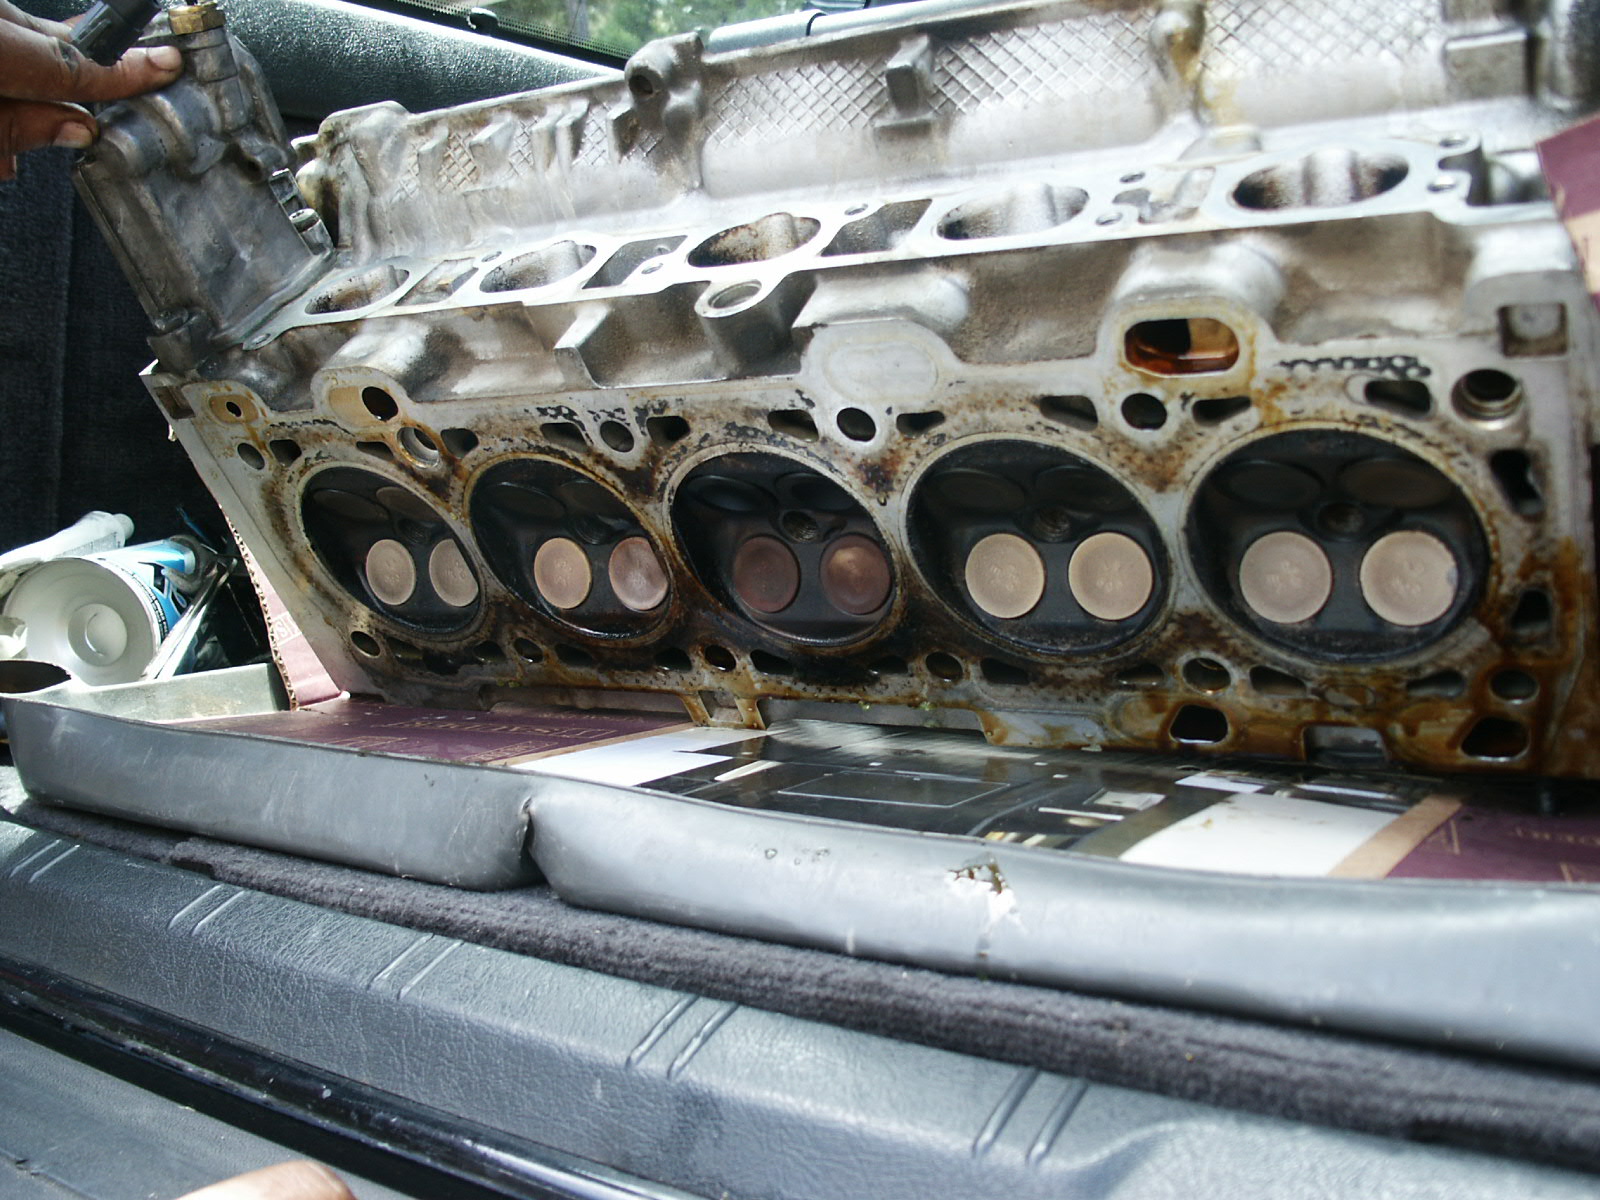
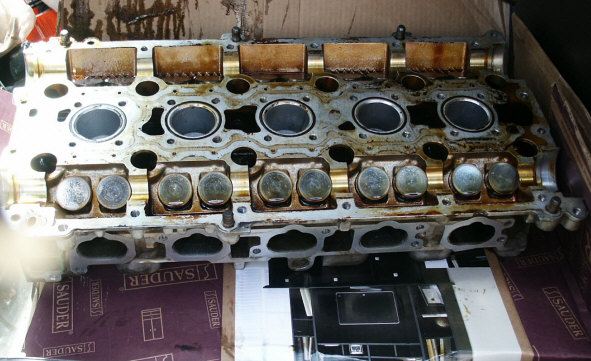
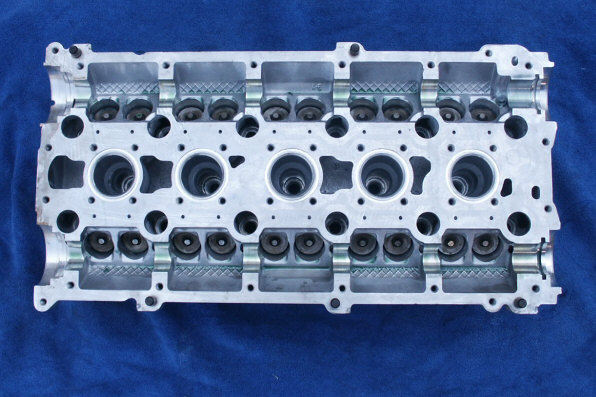
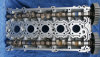
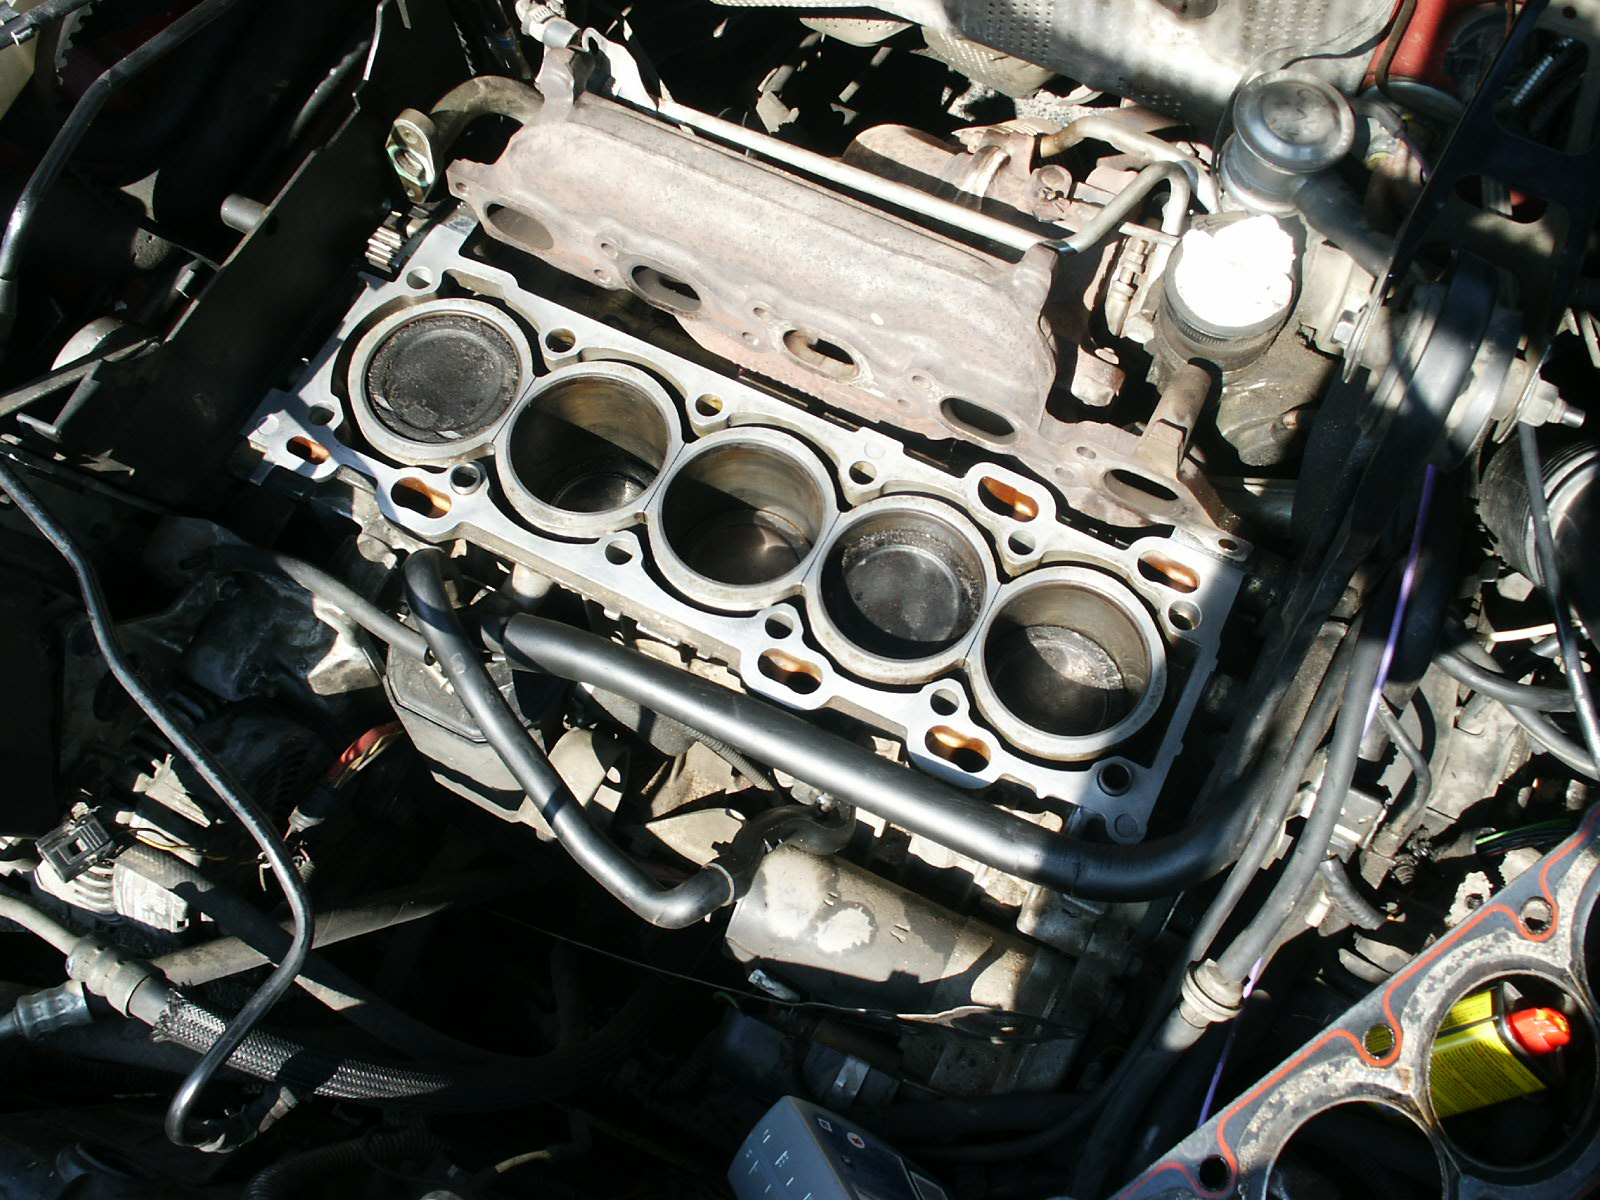
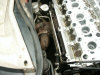
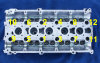
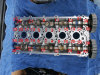
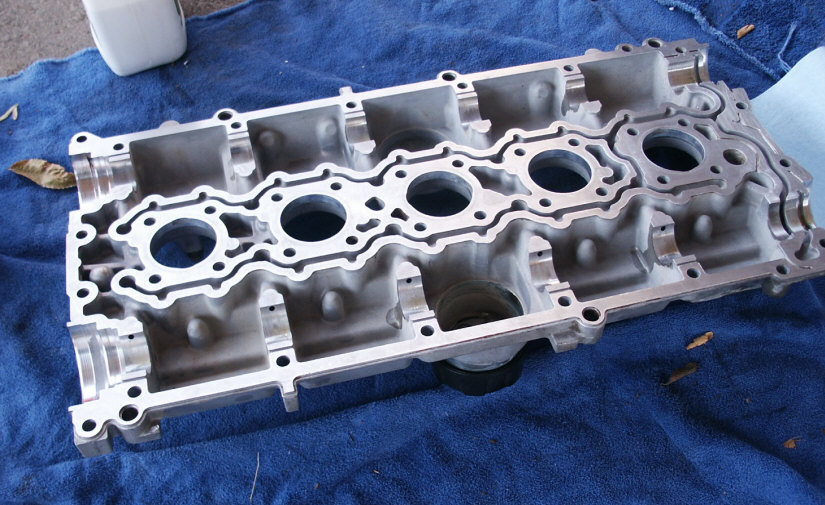
Once all the bolts are out, simply rock the head loose and lift it out. If you can get some help, that would be great. You don't want to hurt yourself or damage the head lifting it by yourself. Once off you can inspect the head and see if you have any damaged valves.

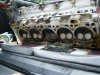
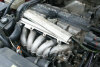
NOTE: These photos are large for you to get a good view of the head removed. -
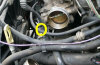
Remove the thermostat housing from the head. It has 3 bolts in it, T-35's I believe. Be careful not to strip them.
-
Decide if you are going to secure or remove the exhaust manifold studs in the head. Do one or the other, you don't want to loose them. I removed all of mine and kept them in the car. I used a small pipe wrench to get them out, be careful not to damage the threads.

-
Remove the lifters. I used a magnet, they cam out pretty easy. Some people keep them in the order they came out of the head, I did NOT. Didn't see the need. Either they're good or they are bad. If bad, replace them with new ones. Once removed I put them in a tub of oil to soak and keep them filled with oil.

-
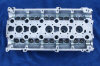
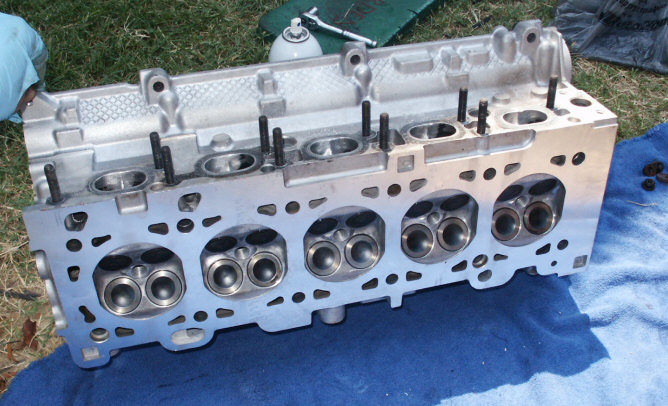
Send/deliver the head to the shop. There is no need to clean it up, they will do a good job at that.
NOTE: If the head overheated or has a lot of miles (over 100,000 on the head since it was last overhauled) it would be a good idea to change the valve stem seals. I sent them to the shop to do for me, had no thought of changing them out myself, some have. (I'll find the link to the DIY instructions and post them here soon).
NOTE: If you have bad valves, you can replace them yourself or send them to the shop to have them replaced.


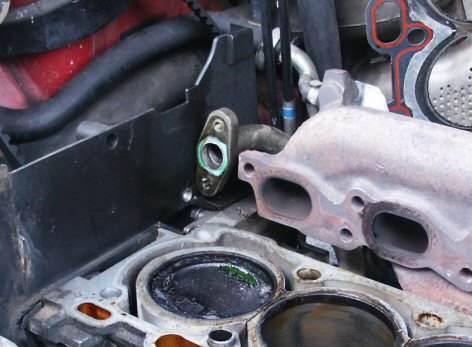


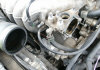
CLEANING THE BLOCK AND PREPARE IT FOR THE HEAD TO GO BACK IN: The block will need to be cleaned and inspected to make sure the new gasket will seal properly and you do not have any other issues. I failed to check my exhaust manifold over good because looking at the after photos, it appears that my exhaust manifold is cracked. I would say that it took my about 2 hours to clean everything off real good. You may want to take the cover to the head shop to see if they will clean it up for you. It WILL save you some time and they may NOT charge you for it since they are doing work on the head (I did not ask but wish I had). You can go here to view some tips from Tracy.
-
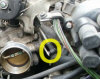
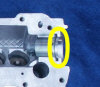
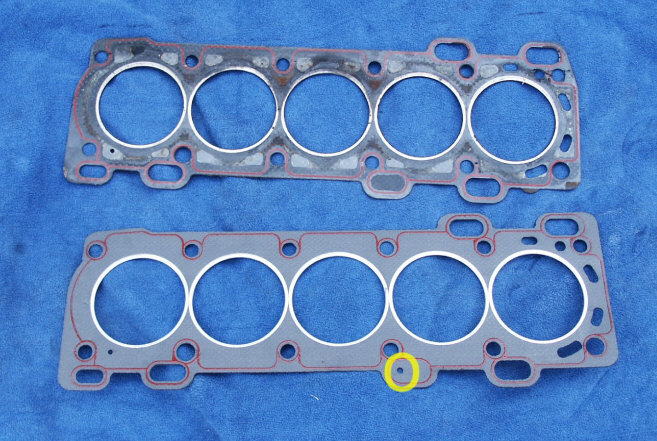
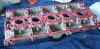
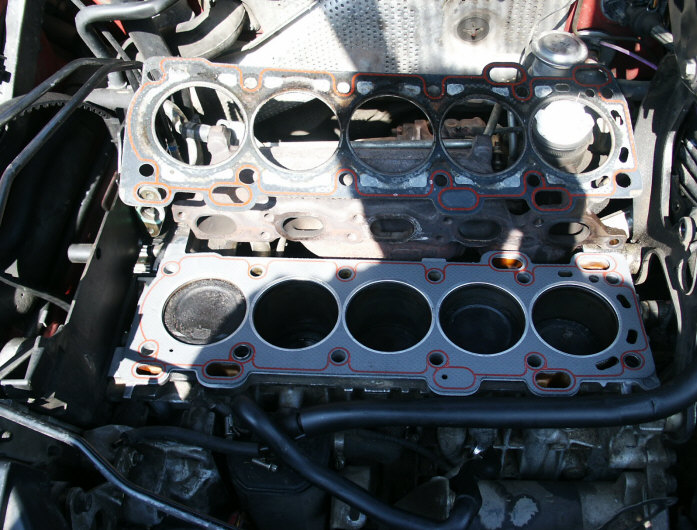
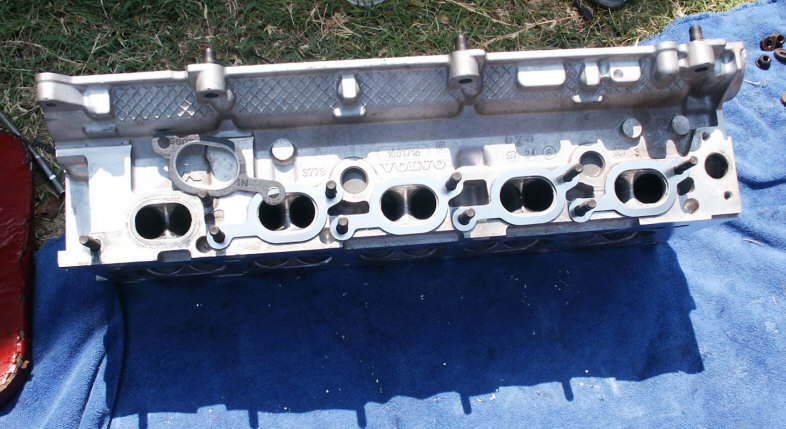
Remove the old head gasket. Mine lifted off pretty easy. That is the main reason I believe the gasket was not original.
NOTE: The second photo shows the block/head guides that are used to line up the gasket and head.
NOTE: Notice the gasket orientation so you will install the new gasket in the proper direction.
NOTE: I also believe that the WRONG gasket was installed on the car. In the picture below you will notice that my new gasket has an additional hole in it.

-
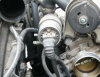
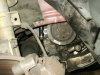
Inspect your exhaust manifold for cracks. If you see cracks on any side of it, you probably should replace it.
-
Inspect your vacuum lines for cracks and splits. If you find some damaged, replace them.
-
If your car has old water hoses on it, this would be a great time to replace them. A blown old water hose will cause the car to loose coolant and over heat real quick.
-
Replace your PCV system if it need to be replaced, there is no better time than the present.
-
Replace timing belt components if that was in your plans, I did not because my timing belt was only 20,000 miles used.
-
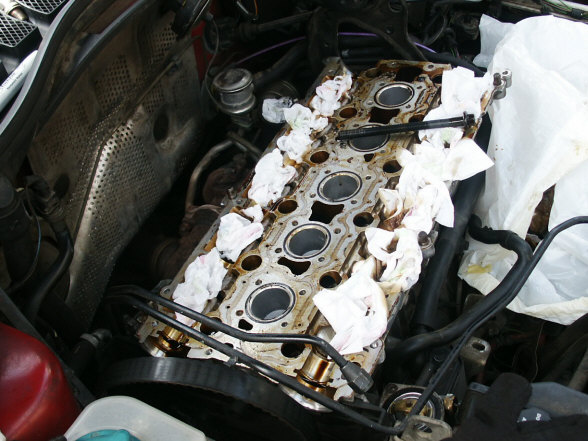
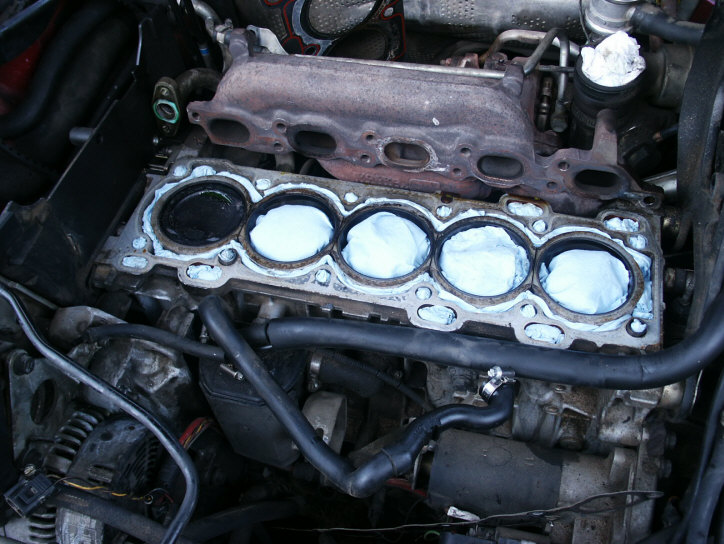
Stuff the ports on the block and other parts you plan to clean with solvents with shop towels. I used the heavy duty shop paper towels. I did not want the solvents to get down into the motor chambers, etc. Don't forget the water line that goes in the back of the block.

-
Use the gasket remover/cleaner to get the block and other parts clean of all gasket material and other contaminants. I had to use plastic scrapers, etc. to get the old gasket material off of the block, water port and thermostat housing.
WARNING: Follow the instructions on the cleaner that you have chosen to use. -
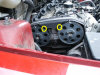
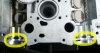
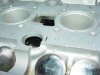
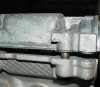
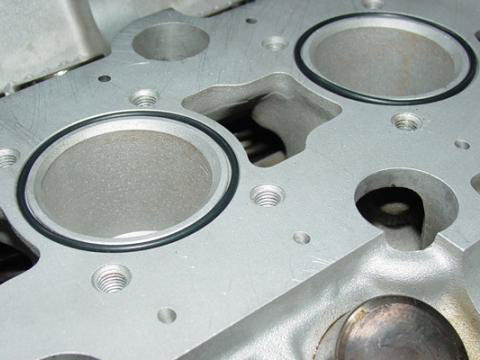
Once you have all of the surfaces cleaned, use acetone to get the surface spotless.
NOTE: The photo above is large so you can see how clean I got my block.
WARNING: Make sure your head bolt holes are clean and dry. You may want to take one of your good old bolts and run it into the holes to make sure the holes are clear and dry. Once or twice should be good but you want to make sure the new bolts will not run into anything or it may mess up your torque value. -
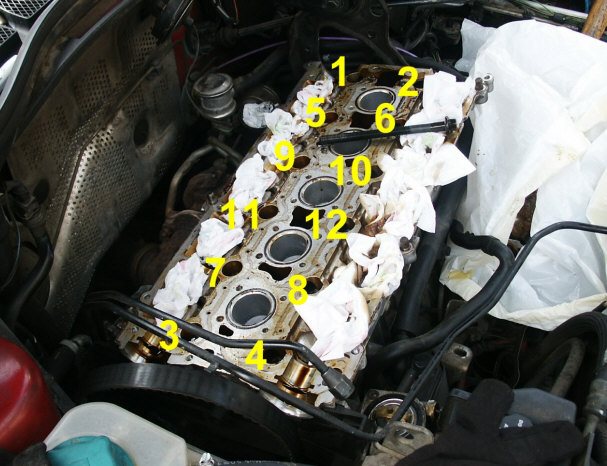
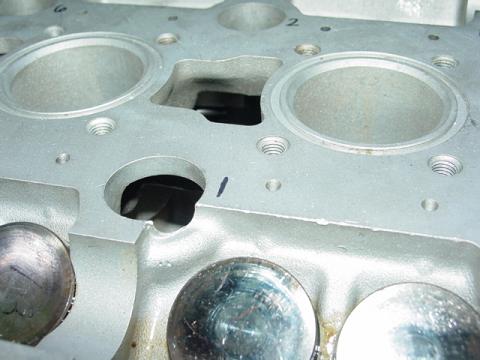
Remove all of the material that you used to plug the holes and chambers. Then do a good inspection of your block again, now that it is clean. I did notice some impressions on my #1, #4 and #5 pistons. Maybe this is were valves had contact with them if this car had a timing belt break (maybe that's why the head was pulled prior to my ownership).
-
Clean the cams.
-
Replace the front cam shaft seals if planned to. They will slide off the cams, be sure to oil the new seals before you slide them on to the shafts.
-
Clean the cam cover. Be careful to get all of the old gasket material off.

NOTE: This will be a good time to paint your cam cover if you plan to have it a certain color. I did not but would if this was my other car because everything under the hood on that car will eventually be black.


INSTALLING THE HEAD: You should make sure that you have all supplies, have a clean work area, and allow yourself at least 4 hours to complete the assembly process.
-
The first thing you want to do is make sure the head is clean and has NO objects in the cavities. Mine had metal shavings in the head which the shop did not tell me about. I found out when I tipped the head over and some shavings fell out. After you are sure there is nothing in it, clean the bottom surface with acetone to make sure it is free of anything that could cause it not to seal with the gasket properly.
-
Place the gasket on the coolant line that will connect to the rear of the head. I used a little of the blue gasket maker to get it to stick to the pipe.
-
Make sure the head is clean and lint free once more with the acetone and allow it to dry. Once dry, place the new head gasket on the block. Be sure it lines up properly. (Some people coat the head gasket with a spray called Permatex Copper Spray. I did not).
-
Place the exhaust manifold studs back into the head.
-
Install the thermostat housing with the new gasket. Do not over tighten the bolts. I used a little of the blue gasket maker when I installed mine.
-
Install the new exhaust manifold gaskets.

-
Soak the new head bolts in oil, that's right oil. I made sure the entire length of the bolts were wet including the underside of the heads. The philosophy here is to make sure that you can properly torque the bolts down to spec. If the bolts are dry or have loc-tite on them they may get stuck and not torque properly. If the bolts have a little oil on them, they will turn each time you go to torque them. The bolts have to be torqued 3 times during the install process.
-
Set the head on the block. You may want to get a little help with setting the head on the block. It is awkward and tricky getting it on the block with the exhaust manifold there and the gaskets trying to fall off every time it is tilted back.
-
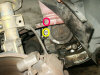
Once you are sure the head is in place and it sits over the two guide studs at the front edge of the block, you can begin to install and torque the head bolts down (there is a special pattern and method so read the entire step before proceeding). The first thing you want to do is wipe down the bolts and set them in the holes one at a time. I took most of the oil off of the bolts with a lint free cloth. I tried to wipe the head dry (the top side of it) and just left a little oil on the threads (I didn't want the oil to fill up the bottom of the block holes and cause pressure/oil to stop the bolts from going all the way down into the block (did not want oil to fill the block holes). Then I snugged the bolts (14mm) down in the pattern sequence with my speed handle. After all the bolts were in, I went through the torque process, see the image below. Tracy advised marking the bolt holes on the head to keep things in order, you don't want to make a mistake and not torque a bolt or two down properly.
a. Torque the bolts down one by one to 15 FT LBS. They are deep in the head so I did have to use an extension.
b. Torque the bolts down a second time to 44 FT LBS.
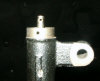
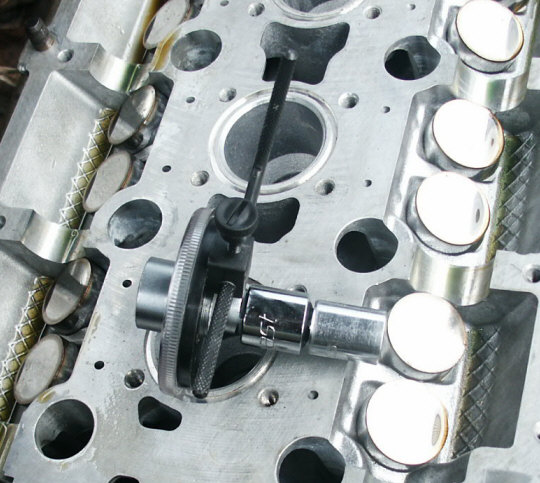
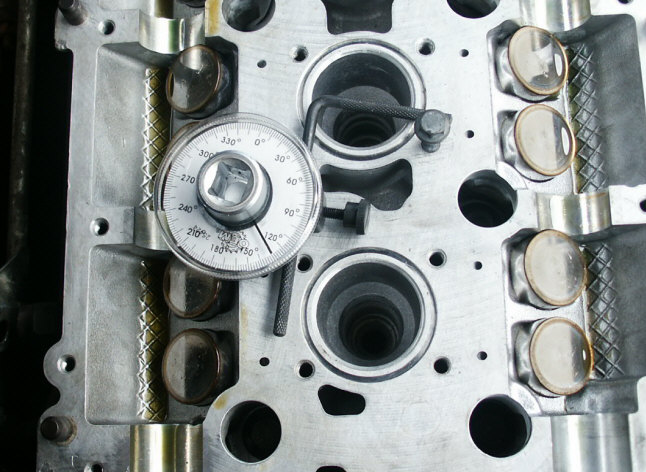
c. Torque the bolts a final time using the torque angle gauge. See the photo below. Once you have the tool set, dial in 0º. Then torque the bolt until the indicator reaches 130º. This final torque value is pretty tough. I used a breaker bar, 1/2" drives and a 1/2" to 3/8" adapter to the socket if you do NOT have a 1/2" 14 mm socket. The only way I could get the gauge to work smoothly was to use one of the cam cover bolts as a stop to hold the angle lever from moving around (see the last picture below).


WARNING: Make sure you use NEW HEAD BOLTS. Old bolts have already been stretched and may break when you try to torque them. An old bolt may go in and torque down, however I have read of people breaking bolts while installing and removing them so I would not advise using old bolts.
NOTE: If you have any concerns, questions, need more clarification visit Tracy's page here. -
Install the lifters. They have been soaking in oil so try not to get to much oil on the rest of the head. I actually ran them down the cam track so the oil would not drip on the rest of the head surface.
-
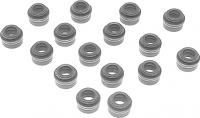
Set the spark plug o-rings on the head in the grove they belong in. If they do not sit flat in their groves, heat them a little in the sun or something so they soften up.

-
Put a little oil or grease on the cam journals and in the path of the cams (in the head) so the cams will not be dry when you start the motor for the first time. I used oil but some have used multipurpose grease. Just a little.
-
Make sure the cams are aligned if you did not lock them together as described in step 49 above. I set the cams into the cam cover, set the timing belt cover on top of it like they were in the head, aligned them with the cover, then locked them together.
-
Clean the top of the head with acetone to make sure the surface is clean and lint free for the chemical sealant (anaerobic sealant) will properly dry and form the gasket.
-
Install the new cams seals on the front if you planned to do so. Using the top cam cover as a guide, insure they are set to the proper depth.
-
Lube the cams shafts if you have not done so already and set the cams in the head. They WILL NOT sit in the head flat or level because the valves are not compressed. Do make sure the cams are aligned/set in the groves in the head.
-
Make sure the top surface of the head is still clean and dry.
-
Clean the mating surfaces of the cam cover one last time.

-
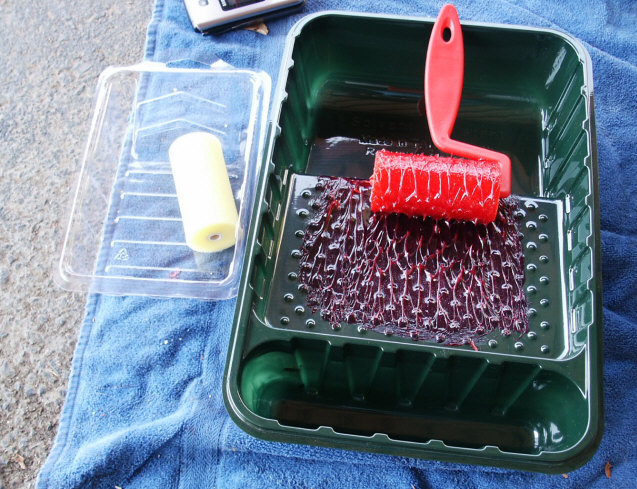
Roll the anaerobic sealant into a rolling pan. I could have used the clear pan to the left but I did not realize it was a pan when I purchased the rollers.
-
Once the sealant is spread into the pan, roll it out on to the cam cover. There is NO NEED TO RUSH during the sealing process. The anaerobic sealant does NOT dry in open air. I left some in the pan for several days and it was still wet to touch, as if I had just rolled it in the pan. The sealant dries/cures in the absence of air.
WARNING: Do NOT put it on thick, just a thin layer need to be applied. If you put it on to think, it will squeeze into the oil tracks in the head/cover and clog the passage ways for the oil to lube the cams and lifters properly. Some of the passages are very small, especially near the front of the motor. -
Set the cover on top of the head and cams. Make sure it is aligned properly. It has alignment pins, 2 in the front and 3 in the back to make sure the cover goes on straight.

-
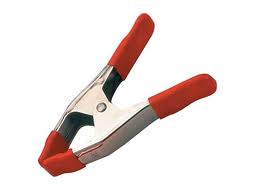
Clamp the cover in place with the squeeze clamps or whatever type of clamps you are using. I used 4 squeeze clamps like the ones pictured below. I positioned them at the corners of the cover, where the pry points are located.

WARNING: If you are using clamps, do not try to draw down the cover on to the head, you may bend the cover. Only draw the cover down if you are using a special draw down tool as some have used. -
Set all 40 cam cover screws in their holes. In a special pattern, tighten the cam cover bolts. From the center, install the screws so they are snug, I say finger tight and 1/2 turn. The photo below will show you the pattern I used. Each pass I made, by the time I got to the end of the cover, the center screws were very loose again. So I again, made them finger tight plus a 1/2 turn. When I made it to the end and the center ones were still tight I did the final torque value which is 15 in lbs.
As I went from the center to the end, the center bolts were pretty loose the next round. I continued the pattern until the head was torqued. This process took about 15 minutes. While I was tightening the bolts the clamps were holding it down as much as they would.
WARNING: If you just start tightening bolts and not using the proper pattern, you will likely BREAK (snap) the cam. That's right, you can actually break a cam shaft in two. So, do not try to speed up this process. If you used a drawdown camping system, it would likely speed up this process.
The final torque value is IN LBS not ft lbs., if you torque them down by ft lbs you will break several of the screws. DON'T DO IT. -
Once the cam cover is secure, you can clean any sealant that came out of the edge, should not be much if any.
-
Install the rear cam seals if you have not done it already.
-
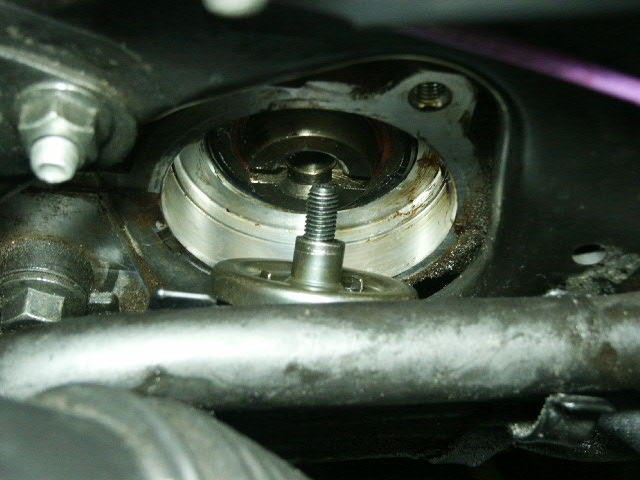
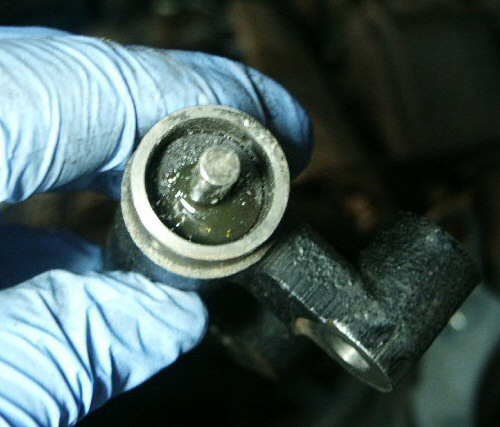
Using the large c-clamp, compress the timing belt hydraulic tensioner. You should use a half turn every few minutes between turns so you don't damage the tensioner. If it leaks any fluid out of the shaft area, it is bad and should be replaced.

-
Once the tensioner is compressed and pinned, install it and the rest of the timing belt as outlined in some timing belt instructions. I would suggest these: Timing Belt Instructions
Start at step 4 and skip any steps you do not need. -
From here, assemble the motor from step 55 working backwards.


Please leave a donation, see the bottom of this page.
End of instructions.